
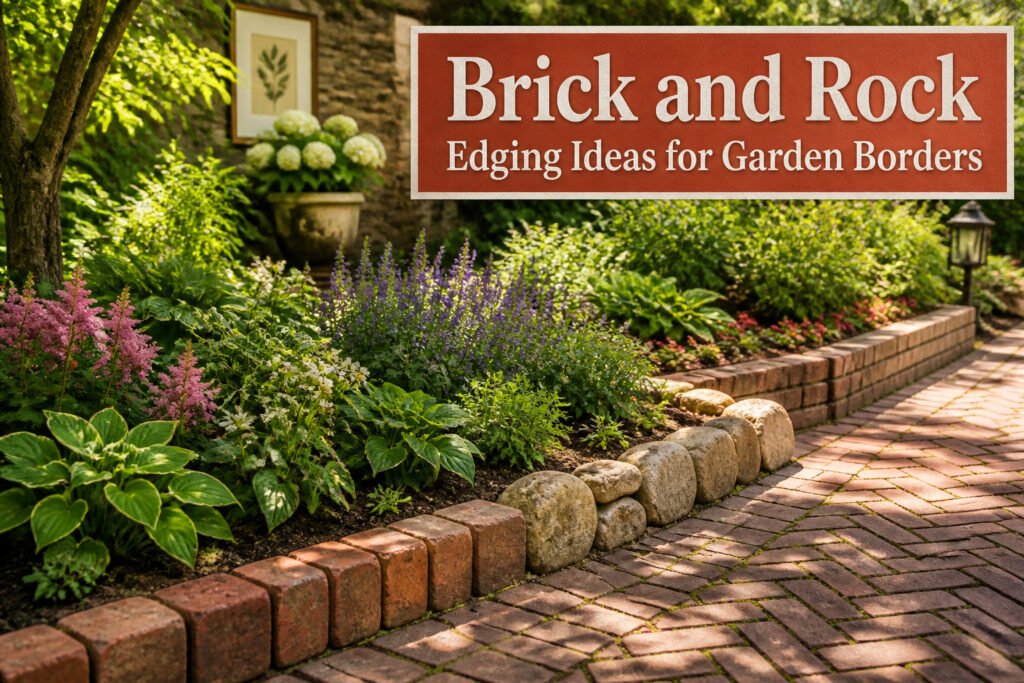
Brick and rock edging ideas with bricks and rocks run from a single flush row you mow straight over to herringbone walls that take a full weekend to cut and set. What separates the right choice from the wrong one is usually height: once a brick border rises past twelve inches, it stops being edging and becomes a retaining wall that needs drainage weeps and severe-weather-rated brick to survive a freeze-thaw winter. The flat-lay trench is six inches deep, half that for anchoring, with two to three inches of compacted gravel underneath.
1. Double Stacked Brick Edging
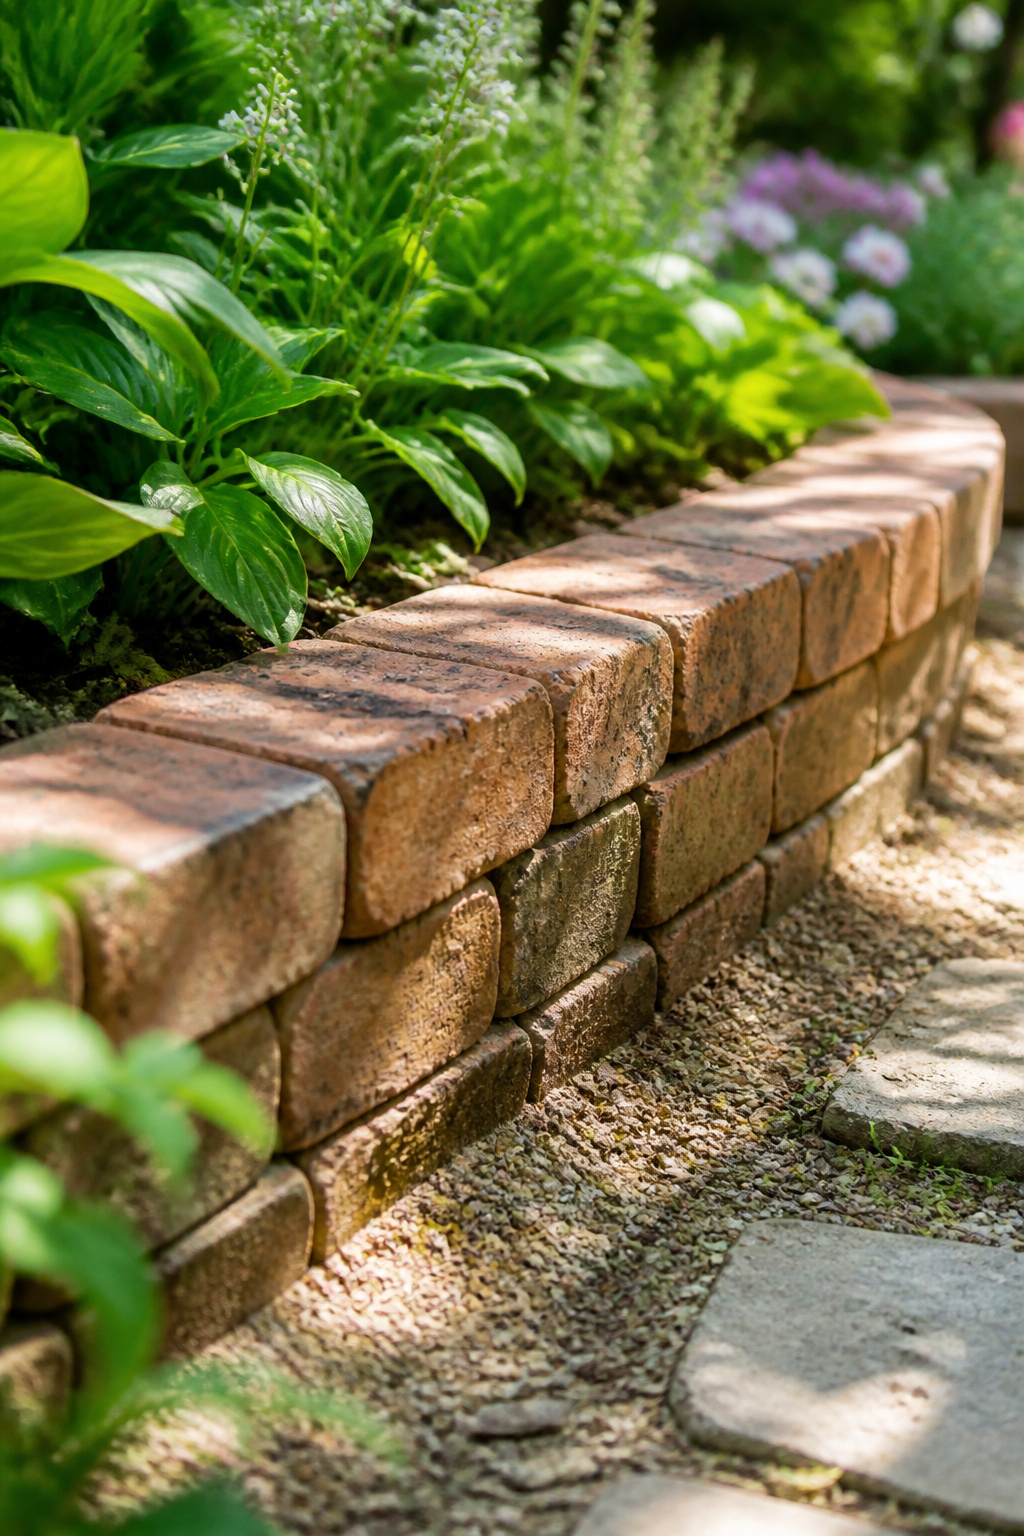
A single layer of brick edging reads flat against grass or mulch, which is why double stacking changes the whole effect. The second course adds real height, usually four inches above grade once standard bricks are set, and that lift catches light differently than a flush line. Two-tier brick edging also does quiet work as a low retaining wall. Soil, compost, and mulch stay put through heavy rain or enthusiastic watering instead of spilling onto the lawn.
Standard bricks run about 8 inches long, and the trench for the base course needs to be at least 6 inches deep. Half that depth anchors the brick below the surface line while leaving room for a 2- to 3-inch layer of compacted gravel plus an inch of sand or stone dust to level on. I would not skip the base in freeze-thaw country; the bricks heave and the second course tilts with them.
Stack them soldier-straight for a clean, formal edge, or offset the top course in a running bond if the garden itself is loose and wild. Either way, the visual weight sits lower and heavier than single-layer options, and the small retaining effect is genuine enough to keep a raised bed from slowly flattening at the rim.
2. Single Flat-Lay Brick Edging
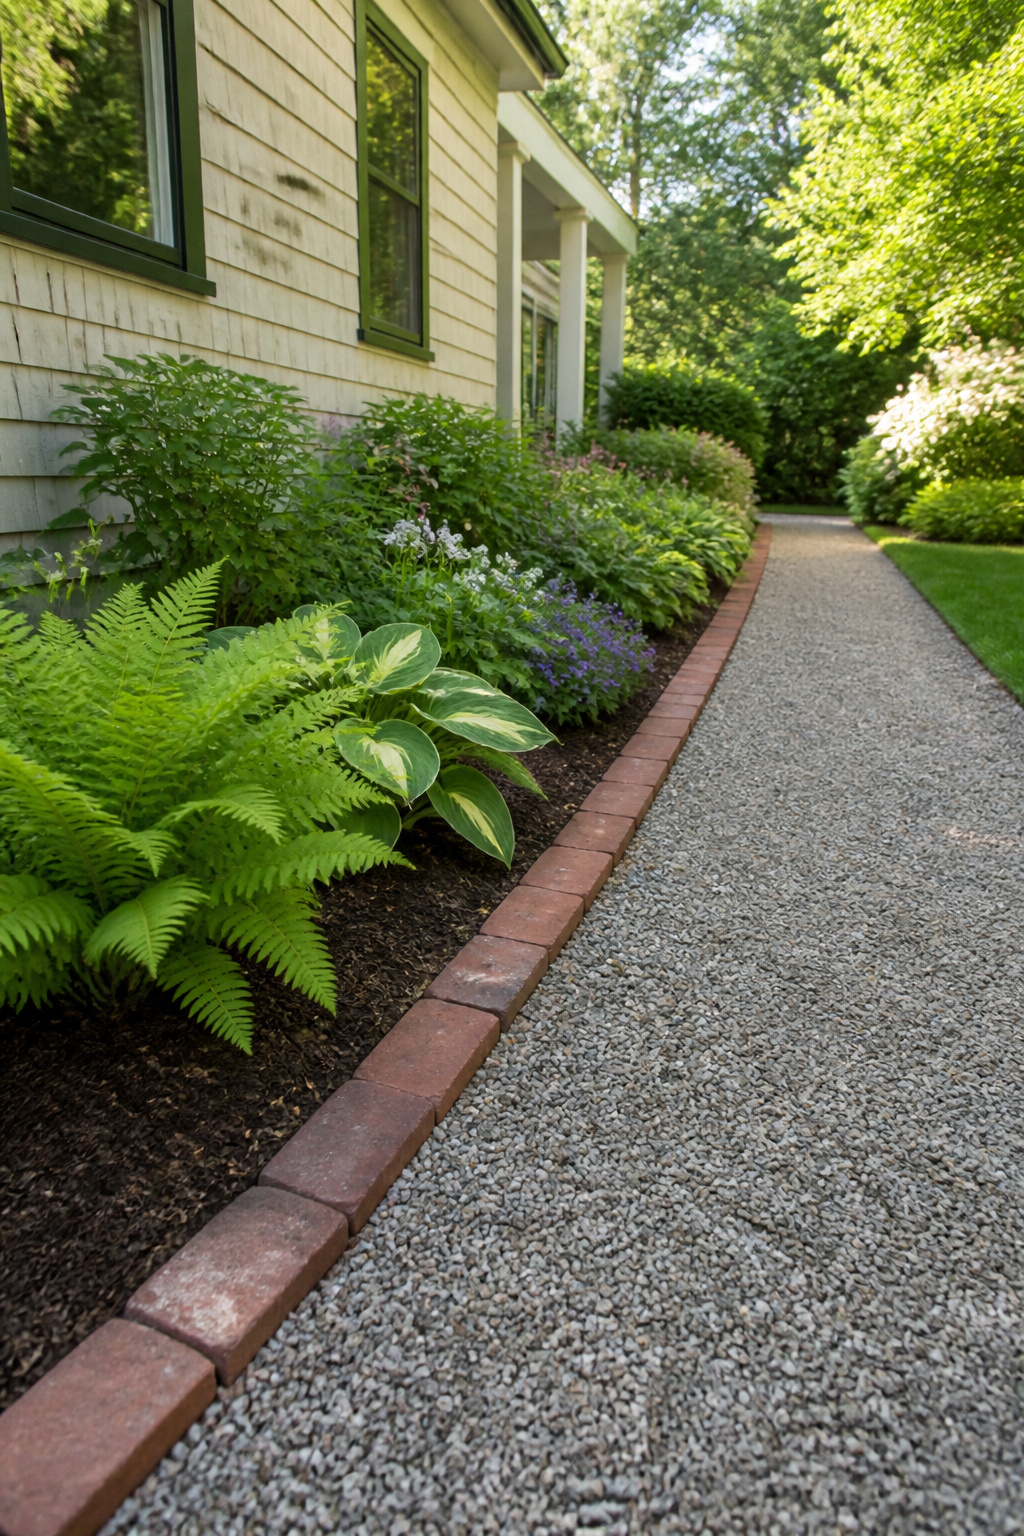
A single row of red brick laid flush with the soil line is the quietest edge you can build. The plants do the talking, and the border steps back. I have come back to this style after flashier experiments because it solves a problem I keep creating: drawing attention to the hardscape instead of the garden.
The work starts with a 6-inch trench and a base of 2 to 3 inches of compacted gravel. Half the brick sits below grade, which keeps it from wandering through freeze-thaw cycles. Some guides add an inch of stone dust or sand on top of the gravel, though on a small bed I have skipped that layer when the gravel packed dead flat and the brick sat level without it. The risk is a wobble you notice every time you mow; the time saved upfront costs more later.
Set the bricks tight together, check with a level, then backfill and tamp both sides. A plastic paver edging restraint along the outside helps in climates where the ground heaves, but on a modest border in stable soil, firm tamping has held for me. The sawtooth or angled patterns you sometimes see start from this same flat base, just turned. I leave them alone. The whole point of this version is restraint, and angling the brick is the first step back toward ornament.
3. Half Brick Edging
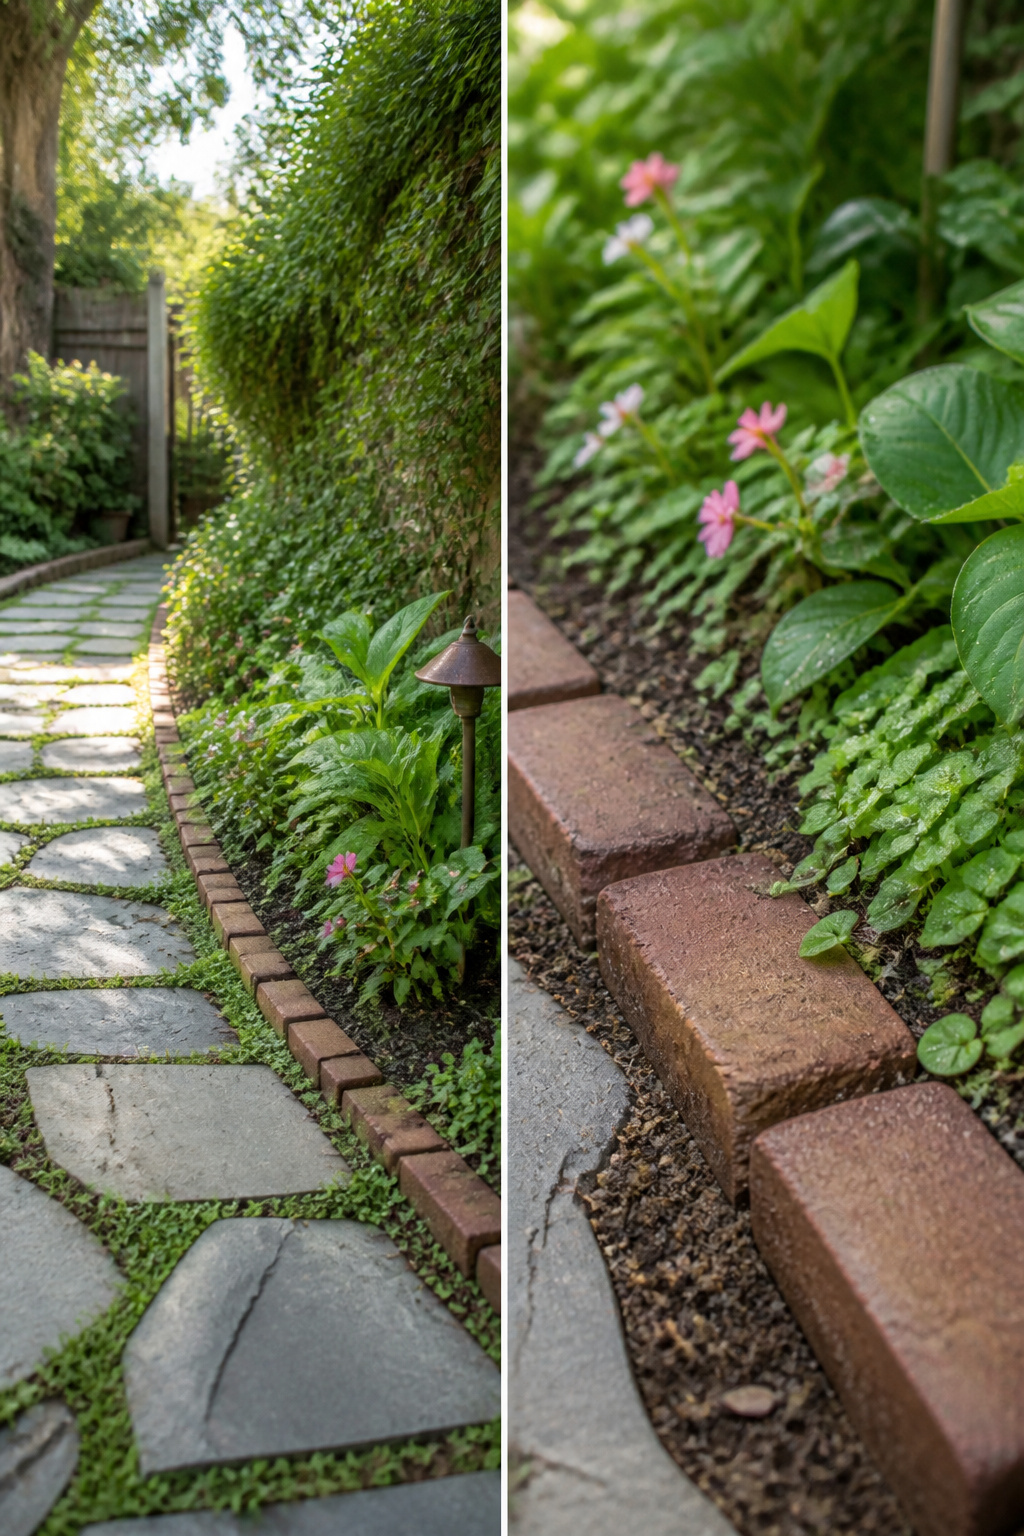
Running the same brick from a walkway straight into the bed edge knits two hardscape pieces into one plane. The eye reads it as a single gesture rather than a lawn that stops and a garden that starts, which is why I like it for small yards where every transition costs visual space.
The failure I have watched, and once had to reset, comes when soil or mulch drifts above the brick line. Half the point of this edge is the clean datum it sets; bury even an inch and the walkway starts to look sunken, the bed sloppy. Keep the soil surface a half-inch below the brick top and the geometry holds.
A creeping fig planted against the wall behind that edge will soften the joint without invading the line. It takes shade, clings tight, and in zones 8 and above it stays out year-round. That contrast, crisp brick below and matting vine above, is what makes the pairing feel deliberate rather than planted by default.
4. Curvy Brick Edging
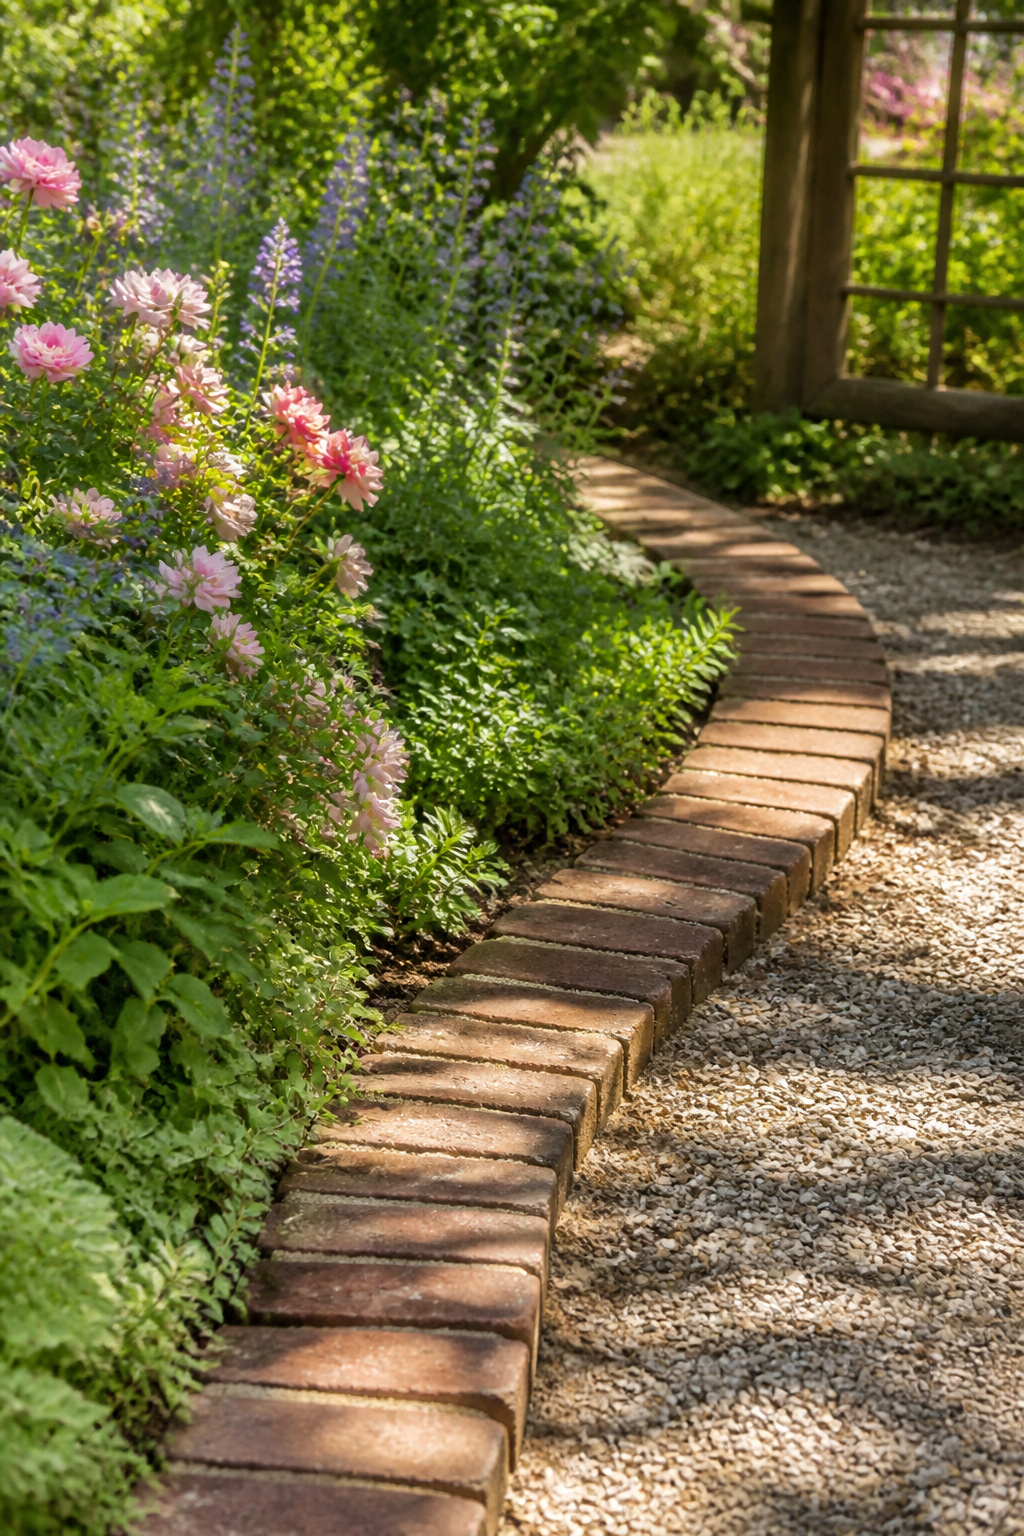
A curved brick border softens the edge of a bed in a way straight lines never quite manage, but the curve creates its own problem: every brick sits at a slightly different angle, and the gaps can look like a mistake if you are not deliberate about them.
For soft curves, fan the bricks out slightly with near-touching joints. Tight curves need a triangular gap at the peak, widest point no more than a brick width. Keep those gaps consistent so sand fills them evenly later; uneven spacing reads as sloppy installation, not intentional design.
The sand base matters more here than with a straight run. Each brick tilts its own direction, so the bedding layer has to level and lock every contact point independently. Dig deep enough to bury about a third of the brick for stability, then lay 2 to 3 inches of compacted gravel topped with 1 inch of sand. Without that packed substrate, the outer bricks of a curve work loose fast, especially where freeze-thaw cycles hit.
5. Wavy Brick Edging
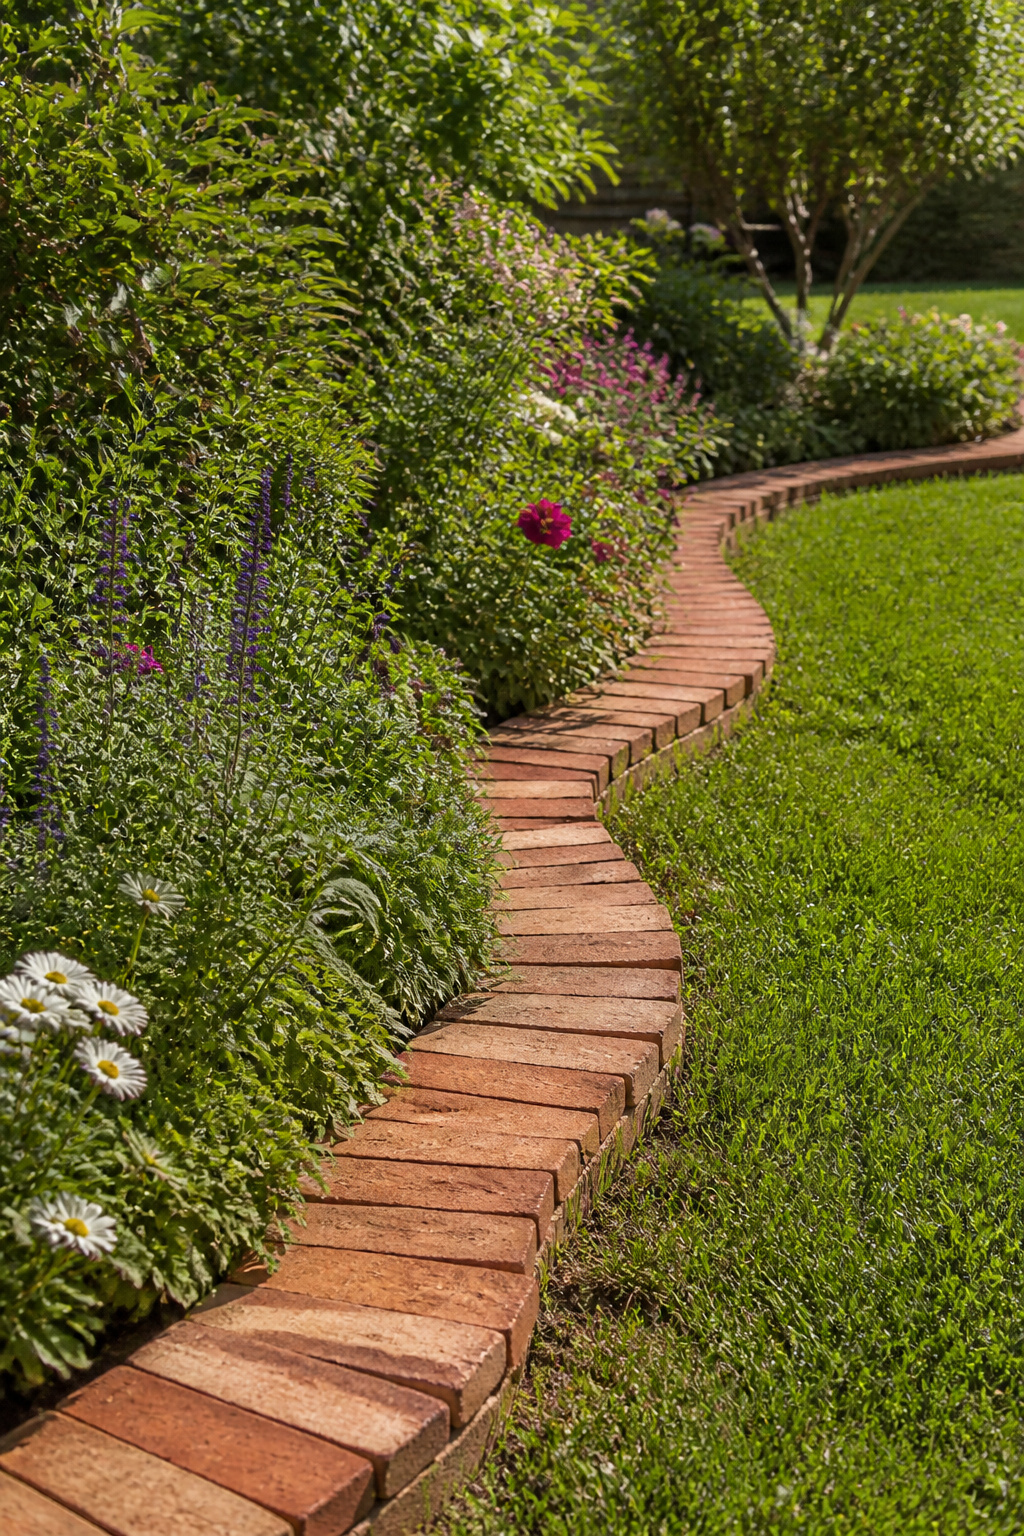
A wavy brick border reads softer than a tight curve because the radius stays longer and the bricks need fewer cuts. The line keeps a rhythm instead of bending into geometry, which is why the look suits cottage beds stuffed with hollyhocks and nepeta better than it suits a formal boxwood border.
Trench depth matters more on a curve than on a straight run. Burying one-third of each brick keeps the wavy line from drifting outward where feet or a mower wheel hit it, and the longer curve means fewer half-bricks to wrestle into place.
Brick edging works best for defining clean boundaries between lawn and planting beds while maintaining a natural look. It’s especially useful in areas where you want a durable edge that can handle foot traffic and lawn equipment without shifting. This type of edging is ideal for relatively level ground and gently curved borders.
That last point is the one to weigh before you start: wavy brick wants fairly flat ground. Steep spots or eroding soil will shift the line by midsummer, and no amount of curve will hide it.
6. Pressed-in-the-Ground Brick Edging
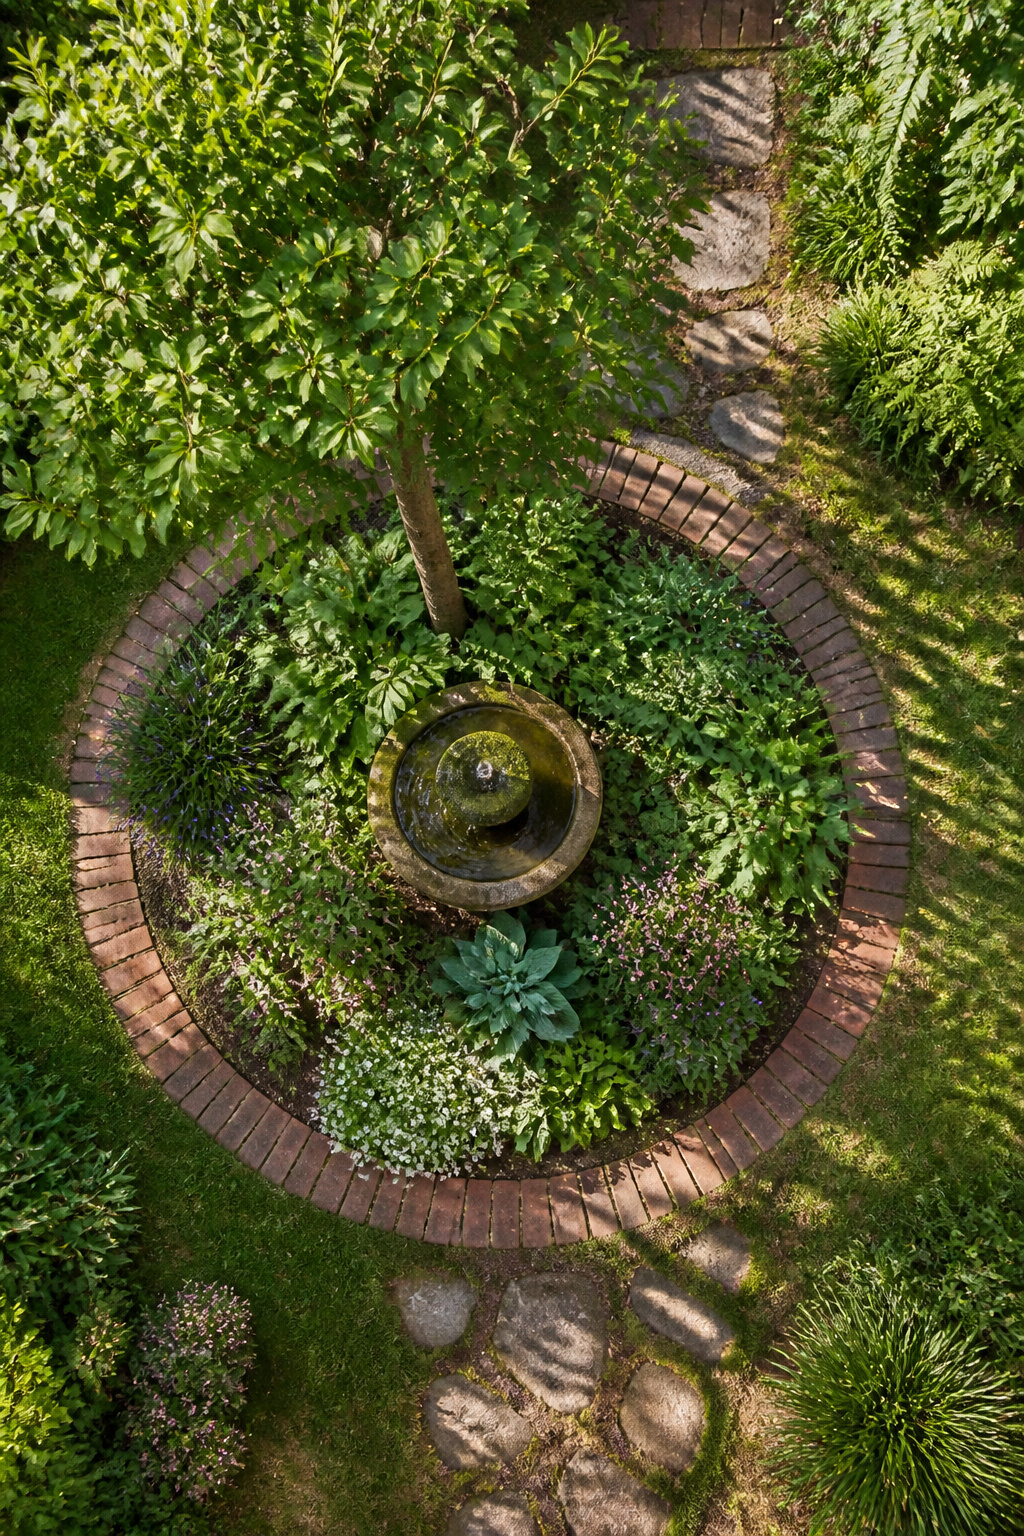
A circle of brick pressed into the ground around a tree or fountain reads as intentional design rather than afterthought, but getting that curve right takes a specific layout move. I scribe the circle first by driving a stake at the center, tying a string to it at the radius I want, and scratching the line in the soil with the other end. That keeps the arc consistent so the bricks sit tight without the wobbles that come from eyeballing.
The trench runs 6 inches deep, leaving room for paver base, stone dust, and the brick itself set flush with the surrounding grade. That flush surface matters more than it looks like it will. Mower wheels roll straight over the top without catching, and nobody trips on a raised lip when they cut across the lawn after dark. Backfill with leftover stone dust against the rear edge, then soil over that, and the border stays put through freeze and thaw.
7. Circular Brick Edging
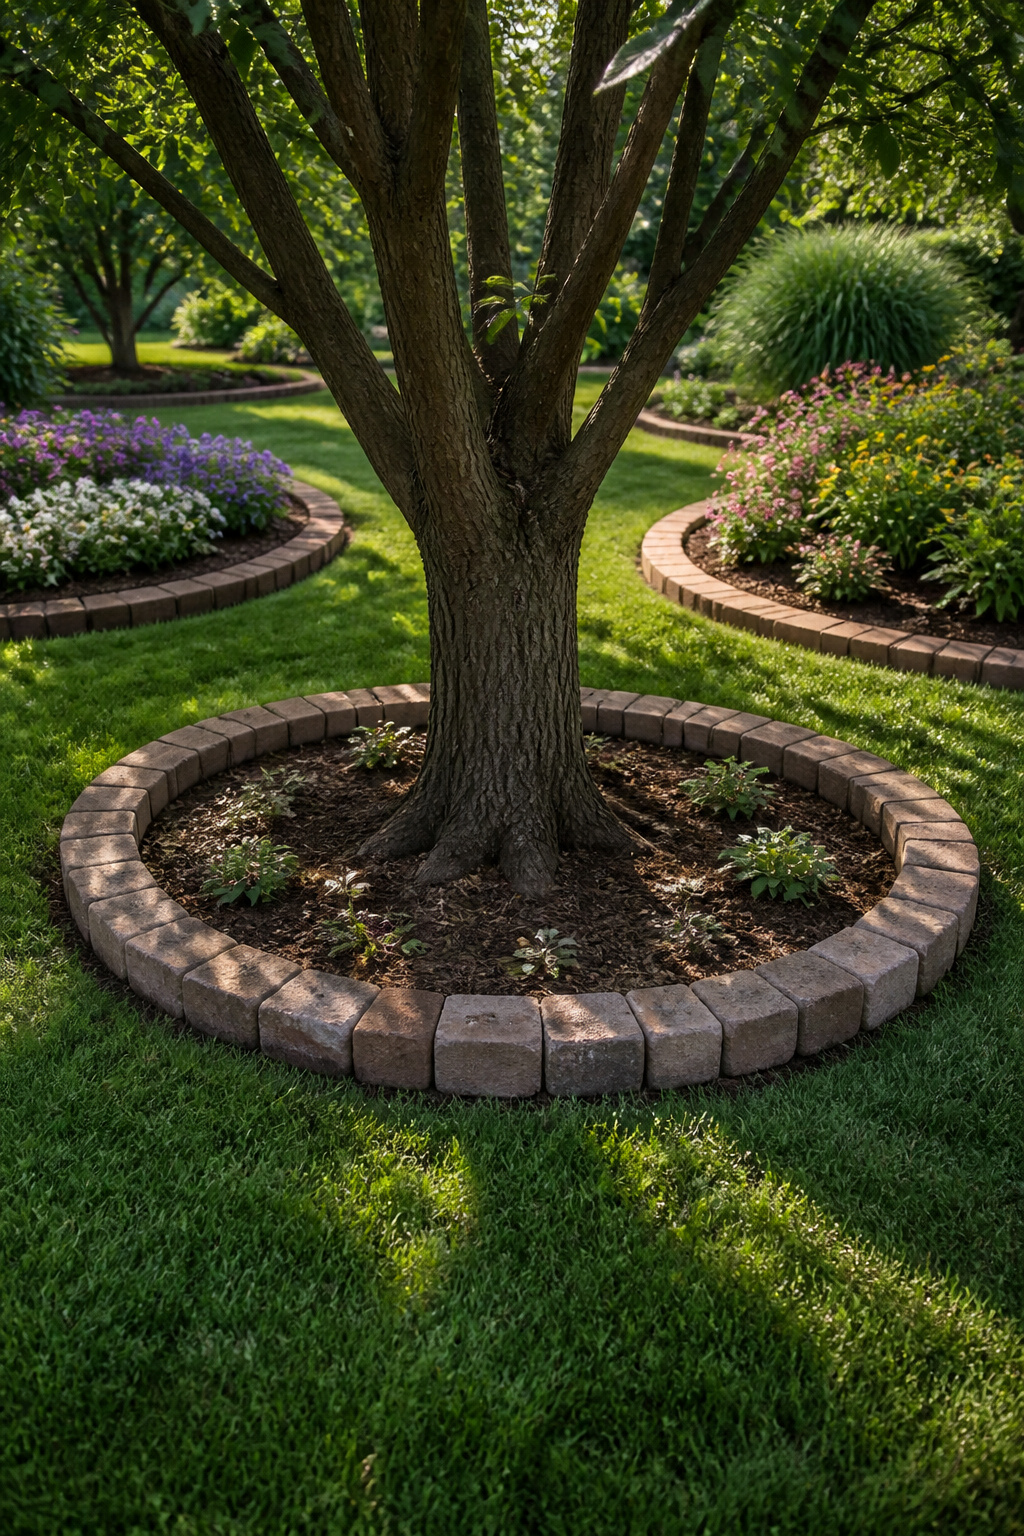
Standard rectangular bricks fight you on tight curves. Each corner wants to sit flat, so you end up cutting wedges or leaving gaps that collect soil and weeds. Rounded bricks, cast smaller than standard, bend around a circle without the fight. The radius determines how many you need; a three-foot bed takes roughly twice the count of straight-line edging, but zero cuts.
I learned this redoing a 1920s cottage border where original rounded bricks still lined the walk. The shape is older than the rectangular paver, which is why reclaimed rounded bricks carry the right feel for a period garden. They are harder to source. Salvage yards and demolition contractors are the places to ask, and the hunt adds cost and weeks to the timeline. For a modern build, new reproductions in terracotta or concrete perform the same structural job without the wait, though the color tends uniform and the surface lacks the soft wear of a century of frost. The choice is whether the garden is telling a story or simply holding a line.
8. Circular Brick Border
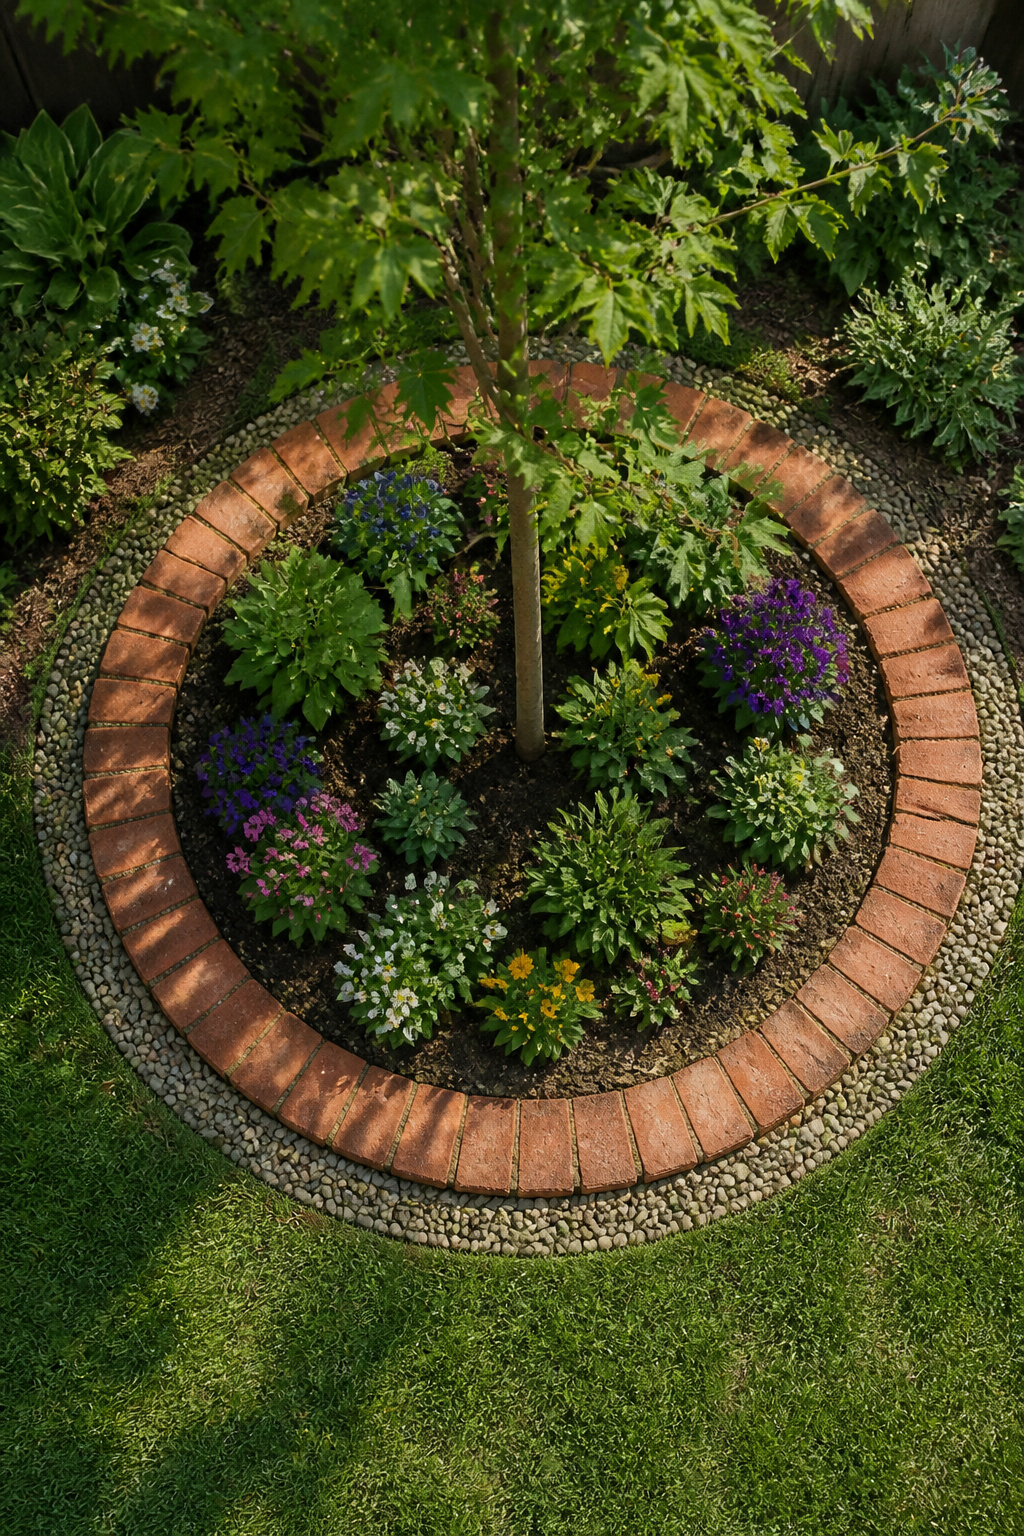
A circular brick border works best when it is the thing being looked at, not the thing doing the looking. Bricks laid in a flat ring on the ground create a target effect that pulls the eye inward, which makes this design ideal for marking a specimen tree, a fountain, or a single dramatic plant you want to isolate from the rest of the bed.
Scale changes everything here. A 4-foot diameter reads as a neat collar, almost a necklace around the base of something, and it keeps the focus tight on what sits inside. Push that to 8 feet and the same ring becomes a stage or a room of its own; the center point has to earn that much space or the circle starts to feel like an empty promise. An 8-foot ring needs a focal point with real height or mass, otherwise the bricks themselves become the only story and the design loses its purpose.
For laying, standard bricks on edge in a simple running bond curve easily enough if you accept the small triangular gaps that open on the inside of the circle. Filling those gaps with matching mortar or tucking low groundcover into them are both honest solutions, but leaving them open looks like a mistake. The ground inside the ring should sit slightly lower than the surrounding bed so water drains toward the center, not pools against the bricks.
9. Higgledy-Piggledy Garden Edge
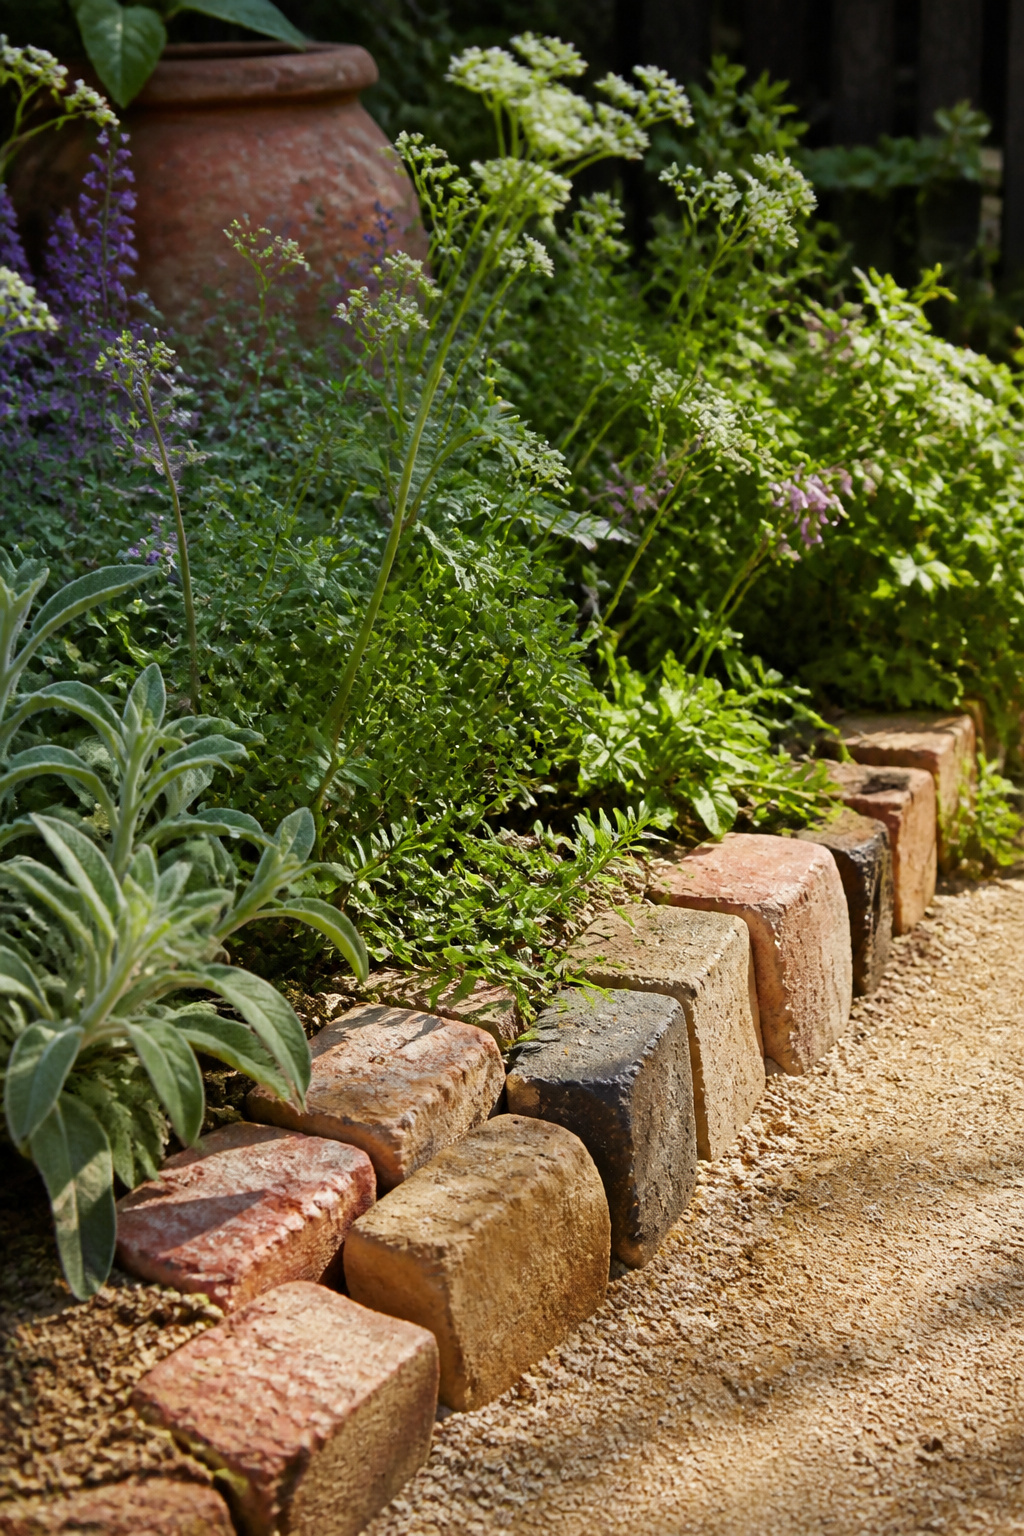
A higgledy-piggledy edge lives or dies by whether the chaos reads as intentional. The first time I laid one, I gathered every mismatched brick I could find: some salvaged from a torn-down chimney, others from a pallet of half-price seconds, a few so old the faces had gone salmon-pink while the cores stayed brick-red. I set them in two hours, stepped back, and saw three big bricks had clumped together like a wall within a wall. The eye goes straight to repetition; it looked like I’d run out of small ones and given up.
I pulled the whole line and started over with a rule: no two bricks of the same size may touch, and leave a mortar gap of roughly half an inch between every piece. The gap is what lets the irregularity breathe; without it, the sizes fight each other. For color, I distributed the palest bricks like salt, one every three or four feet, rather than letting them cluster where the pile had happened to sit. Pine bark mulch against the back side helped the old colors settle into one warm ground.
The sand between them locks nothing; it simply fills so weeds don’t. For tight curves, a triangular gap at the peak, no wider than a single brick at its broadest point, lets the line turn without looking forced.
10. Rustic Stacked Brick Edging

Dry-stacked brick edging gives a garden bed that settled-in cottage look without the mess of mixing mortar. You simply stand bricks on end or lay them flat and stack upward, letting friction and weight do the holding. The catch is height: go much beyond two or three courses and the wall starts to wander, especially after a hard rain or a bump from the mower. I keep mine to a single course of soldier-set bricks wherever the lawn meets the bed, and save taller stacks for spots that do not get regular traffic.
The bricks must carry an SW rating, meaning severe weathering grade. Anything less is a gamble in zones with real winters. Standard builder bricks absorb too much water; freeze-thaw cycles pop them loose or spall the faces until the stack looks like it is shedding skin. SW-rated bricks are fired hotter and denser, with porosity low enough that water stays out of the body. Clay SW brick and concrete paver brick both qualify, but the clay units look softer against cottage plantings. Either way, skip the bargain pile at the salvage yard unless you can spot the grade stamp. I have rebuilt a short border after one January thaw, and the second time I paid the extra thirty percent for SW stock. It has not moved in five years.
11. Textured Brick Edging
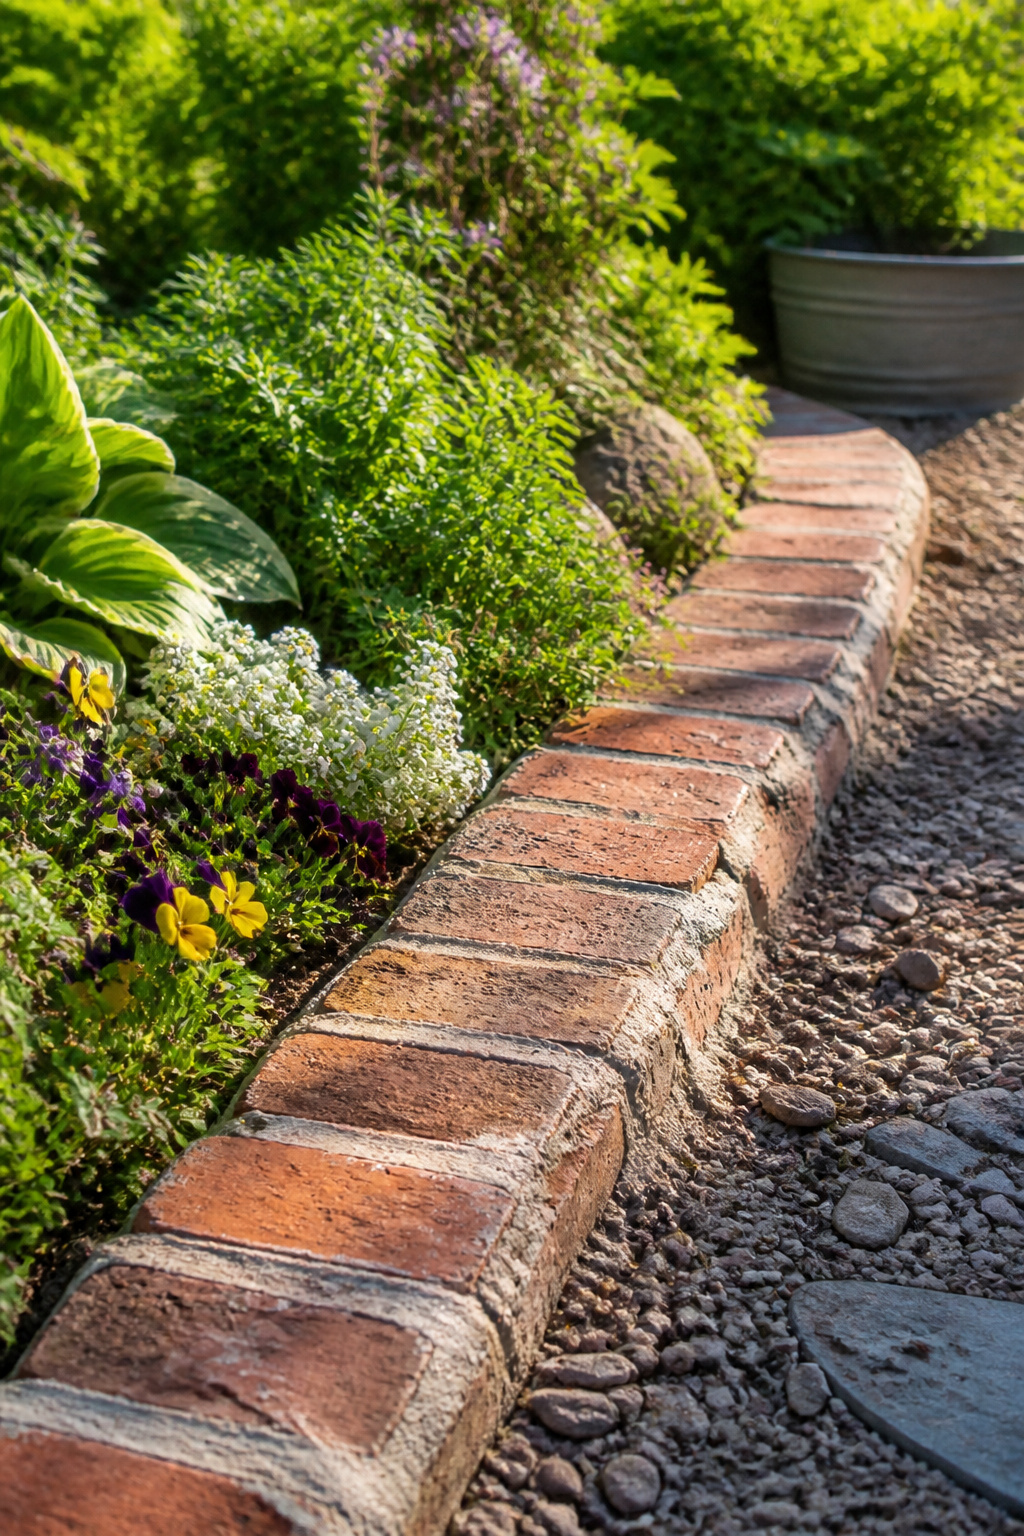
Laying bricks flat and binding them with thick, irregular mortar joints sits somewhere between the looseness of dry stack and the crisp geometry of perfect pointing. The mortar itself becomes the visual texture; wide, thumb-pressed beds and perps catch shadow and give the line a handmade, settled-in quality that reads as rustic without looking accidental.
The mix matters. Six parts stone dust to one part portland cement, barely misted with a hose until it holds together, makes a jointing material that sets firm but stays slightly forgiving under the trowel. That ratio gives you working time and a softer color than straight cement, closer to the weathered tones of old garden walls.
What draws me to this approach is the middle ground it occupies. Dry stack can look unfinished in a formal bed; tooled joints feel stiff beside loose plantings. The thick mortar line here bridges that gap, and the slight variation in joint width lets you adjust as you work without the whole run falling apart.
12. Herringbone Brick Pattern
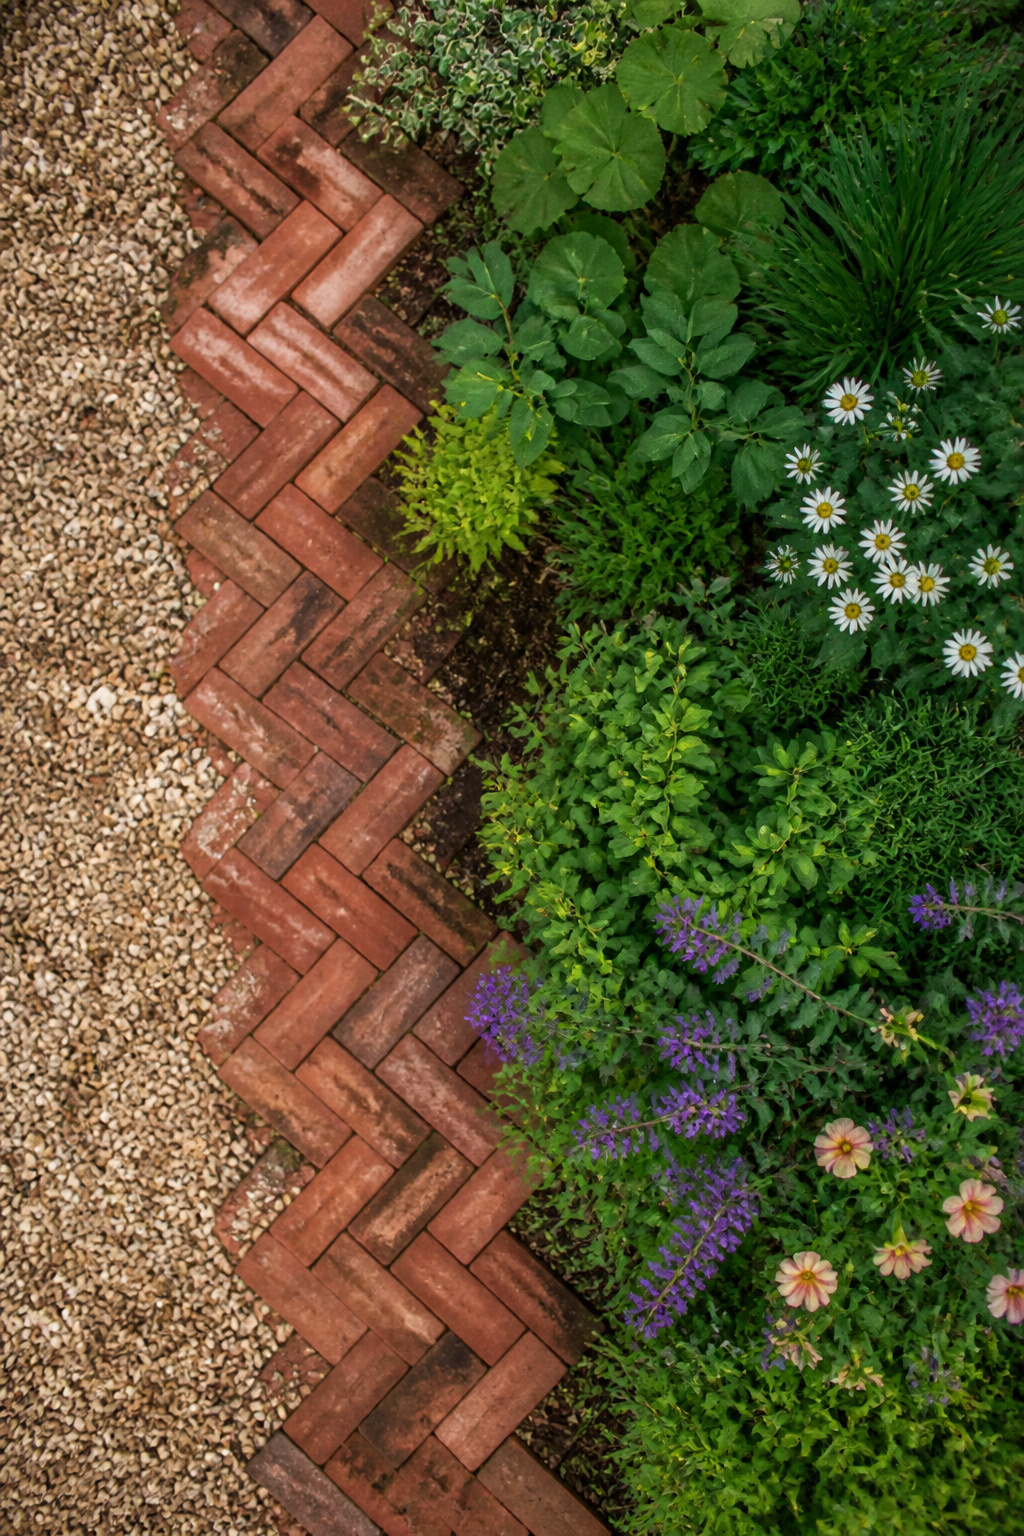
A diagonal herringbone pattern turns a simple garden edge into something worth looking at twice. Bricks sit at 45 degrees to the bed, each one locking over the next like a zipper. That interlock matters more than the look: when wet soil pushes outward after a rain, the weight spreads across multiple bricks instead of levering against a single mortar line the way a basic running bond does.
The labor is real. Each brick needs two angled cuts, and the pattern only reads correctly if those cuts stay consistent across the whole run. For a twenty-foot straight border against lawn, that effort rarely pays off; the mower passes too fast for anyone to register the detail. Herringbone belongs where the edge itself is the destination: the front of a formal herb bed, the frame around a specimen shrub, a courtyard border seen from a kitchen window.
Setting on compacted sand rather than digging a full trench keeps the pattern from sinking unevenly under its own weight. Work dry first, laying the full course without mortar to check your angles, then lift and reset with a thin bed of mason’s sand if the ground is already firm.
13. Saw-Tooth Brick Garden Edge

Upcycled bricks set on point give a jagged, saw-tooth profile that catches the eye without looking fussy. The diagonal face sheds water faster than a flat top, so moss and leaf litter wash off instead of settling in. I source mine from demolition yards or neighborhood teardowns, checking for the "SW" stamp that means severe-weather rating; freeze-thaw cycles will crack anything softer.
Cutting your own is straightforward but dusty. A circular saw with a segmented diamond blade, blade depth set to just barely pass through in one go, does the job. Trickling water onto the cut controls the dust. I always make a test cut on a spare brick first.
The profile wants about four inches above ground, no more. I ran mine at six once, and the third time I scraped an ankle on the point while weeding was the last. The lower height still blocks turf runners and reads as a deliberate edge rather than a tripping hazard. A compacted gravel base and sand bedding keep the line from shifting; edge restraint along the back locks the angle in place.
14. Angled Brick Edging

A single row of bricks laid at forty-five degrees reads as movement without the visual noise of a herringbone weave. Each brick sits alone, tilted on its corner, so the long faces catch light in alternating flashes as you walk the bed. I tried this along a straight thirty-foot run of zinnias after a flat-lay border started looking too much like a sidewalk, and the difference was immediate: the same bricks felt alive.
Dig the trench deep enough that half the brick sits below grade, then lay two to three inches of compacted gravel and an inch of sand for the base. Set each brick tight to the next and check with a level; the sawtooth profile shows every height mistake. Backfill and tamp firmly on both sides. In freeze-thaw country, a plastic paver edging restraint along the outside edge keeps the tilt from slowly flattening over winter. The energy holds only on fairly straight runs; a gentle curve turns the repeating angles restless, and tight circles fight the geometry entirely.
15. Black Brick Edging

A brick border painted to match your home’s exterior gives the planting bed a frame that reads as intentional architecture rather than afterthought. The plants in front of it pop harder against the dark ground, and the curb appeal is immediate.
The paint failure I watched happen was exterior latex peeling in long strips by year two, the moisture underneath having worked its way through from the soil side. Masonry stain costs more up front and goes on thinner, but it fades gracefully instead of letting go in sheets. That difference matters because black brick edging is maintenance, not install-and-forget. Budget for a refresh every few seasons, or the cohesive look becomes a shaggy advertisement for shortcuts.
16. Recycled Brick Edging
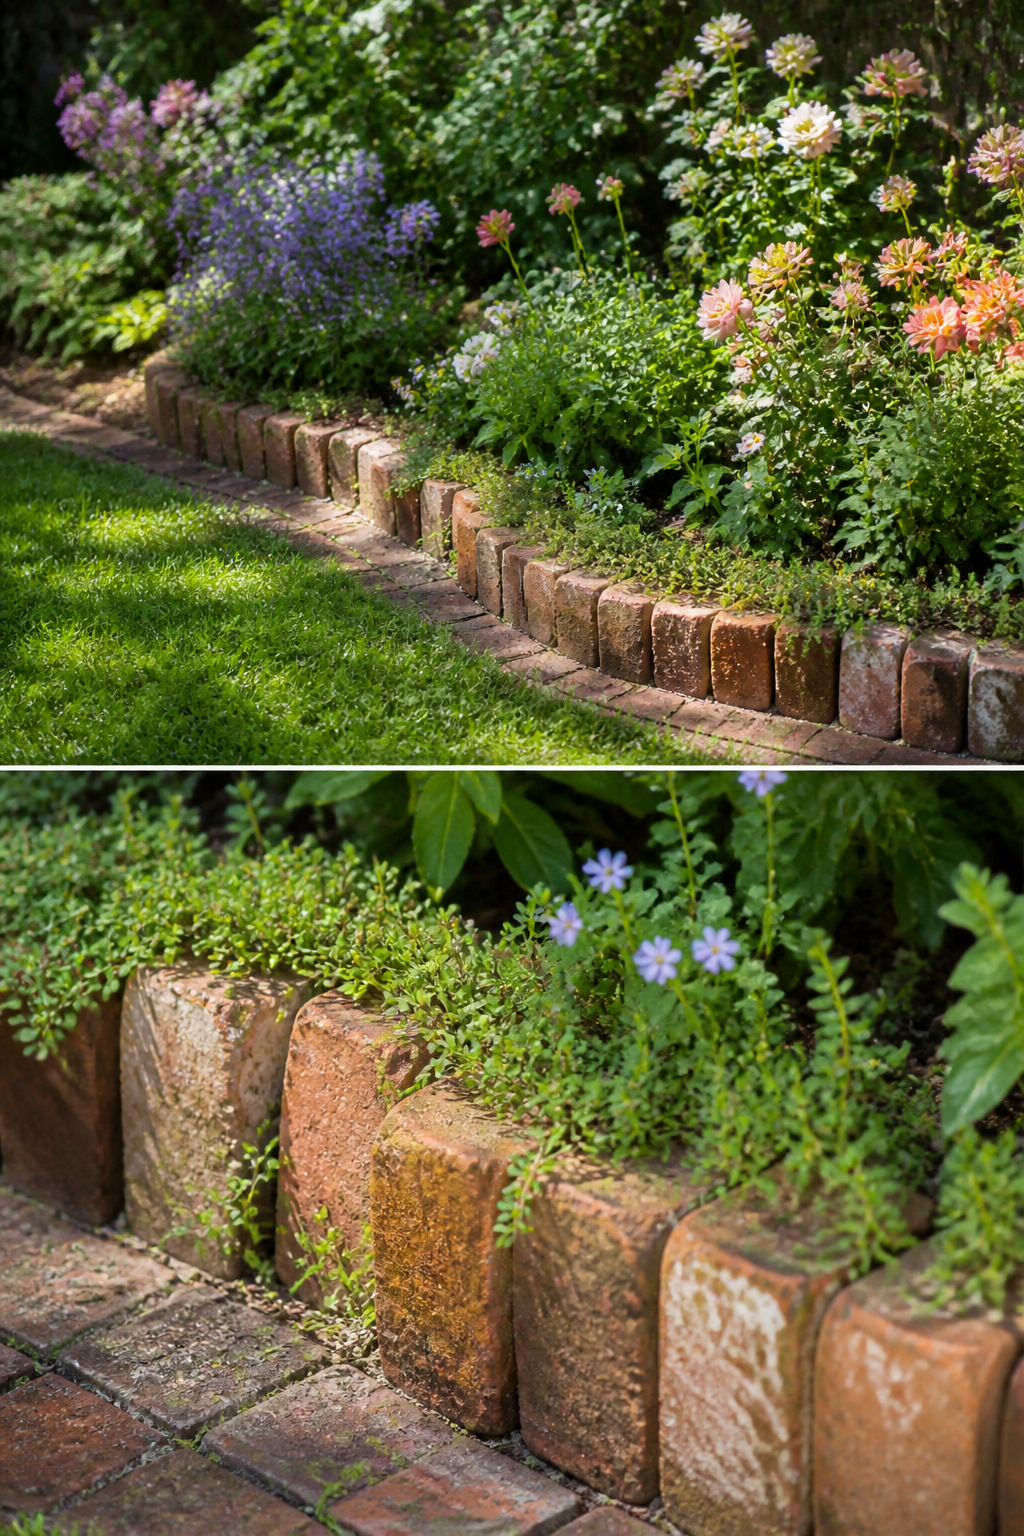
Old bricks pulled from a demolition site carry a patina that new ones spend decades trying to fake. The color variation, the minor chips, the soot stains that survive a pressure wash, these give a border the look of something that settled in rather than something that was installed last weekend. Salvage yards move slowly enough that you can sort through pallets and tap each brick with a hammer to hear which ones ring solid and which ones thud soft. The soft ones, the ones that crumble under a fingernail or flake when struck, are interior-grade or water-damaged; they will dissolve across a single freeze-thaw cycle, particularly in regions like Wisconsin where winter punishes anything porous. Clay brick rated SW, severe weathering, is what lasts decades outdoors, and many reclaimed bricks meet that standard without advertising it, but the hammer test tells you for sure. Choosing reclaimed over new is the sustainable move by default: no new clay mined, no firing emissions, no trucking a finished product across state lines when the material already sits twenty miles from your yard. The character is free; the carbon savings are not.
17. Potager Garden Edging
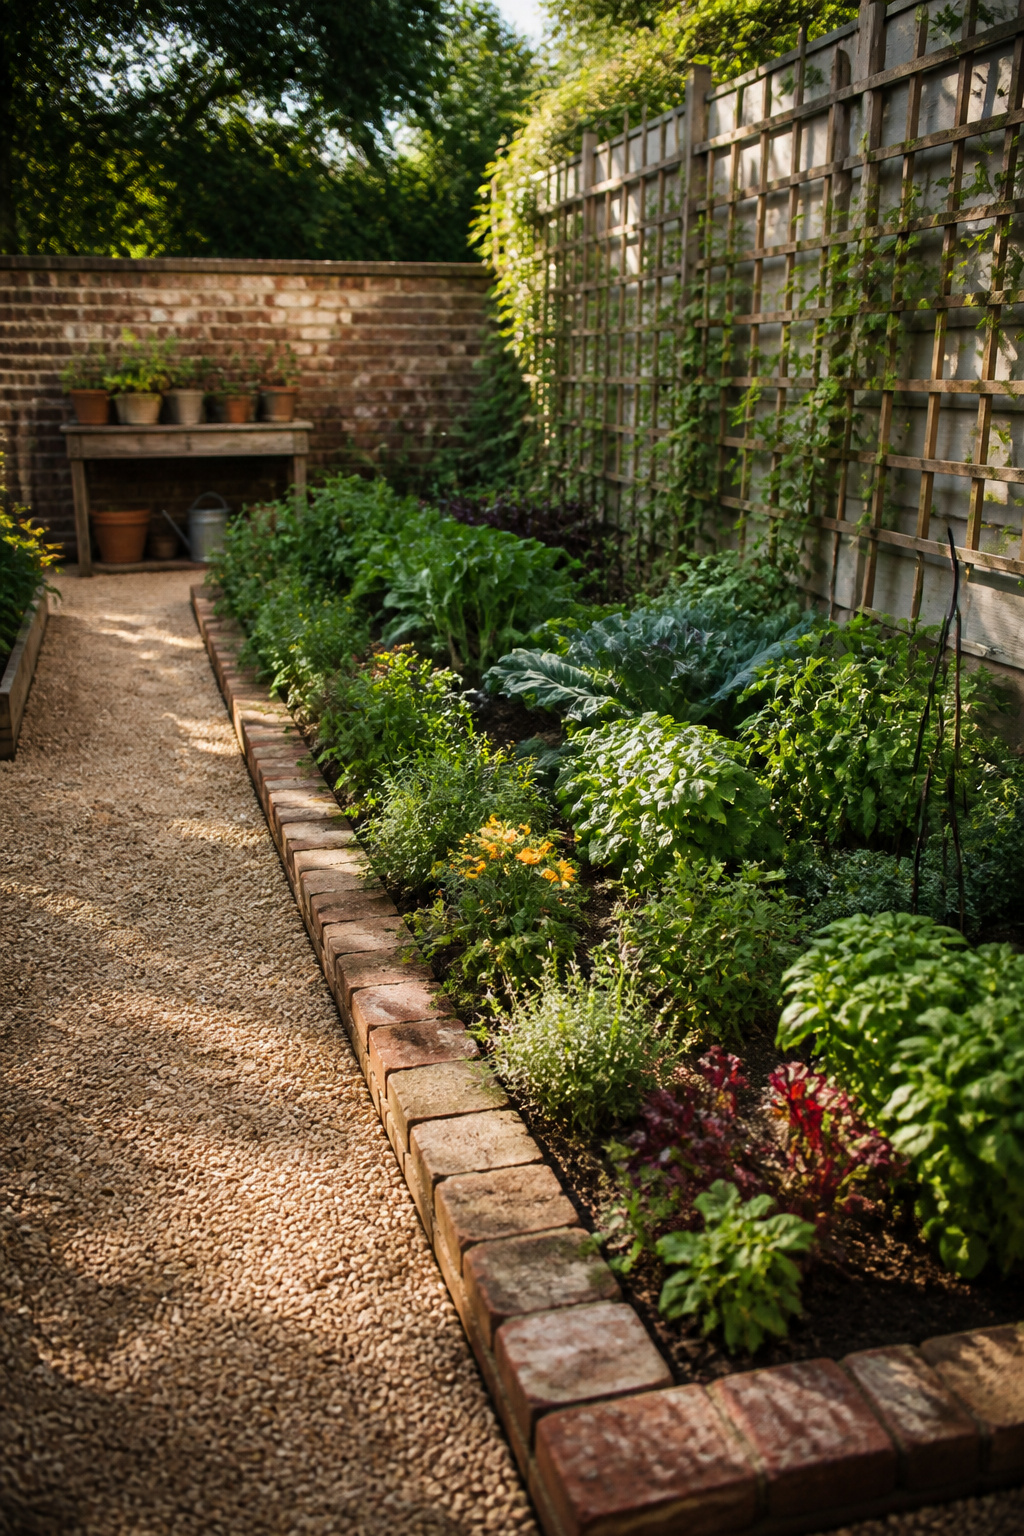
Reclaimed brick laid on sand makes the clean edge a potager needs without mortar or excavation that disturbs the soil underneath. The bricks that work here are 2 by 12 by 6 inches, a proportion low enough to step over easily yet wide enough on top to sit on while you cut lettuce or tie up tomatoes. At roughly twelve inches across the cap, the wall doubles as a garden seat; anything narrower leaves you perched, anything taller and the edge reads as a barrier instead of a place to pause.
Sand-set joints let water drain through the path rather than pooling against the beds, and the slight give in the base means frost heave will not crack the line the way it would a rigid footing. The color contrast between fired brick and living soil does the visual work, reinforcing the geometry that defines a kitchen garden without needing raised timber or steel.
18. Raised Brick Bed
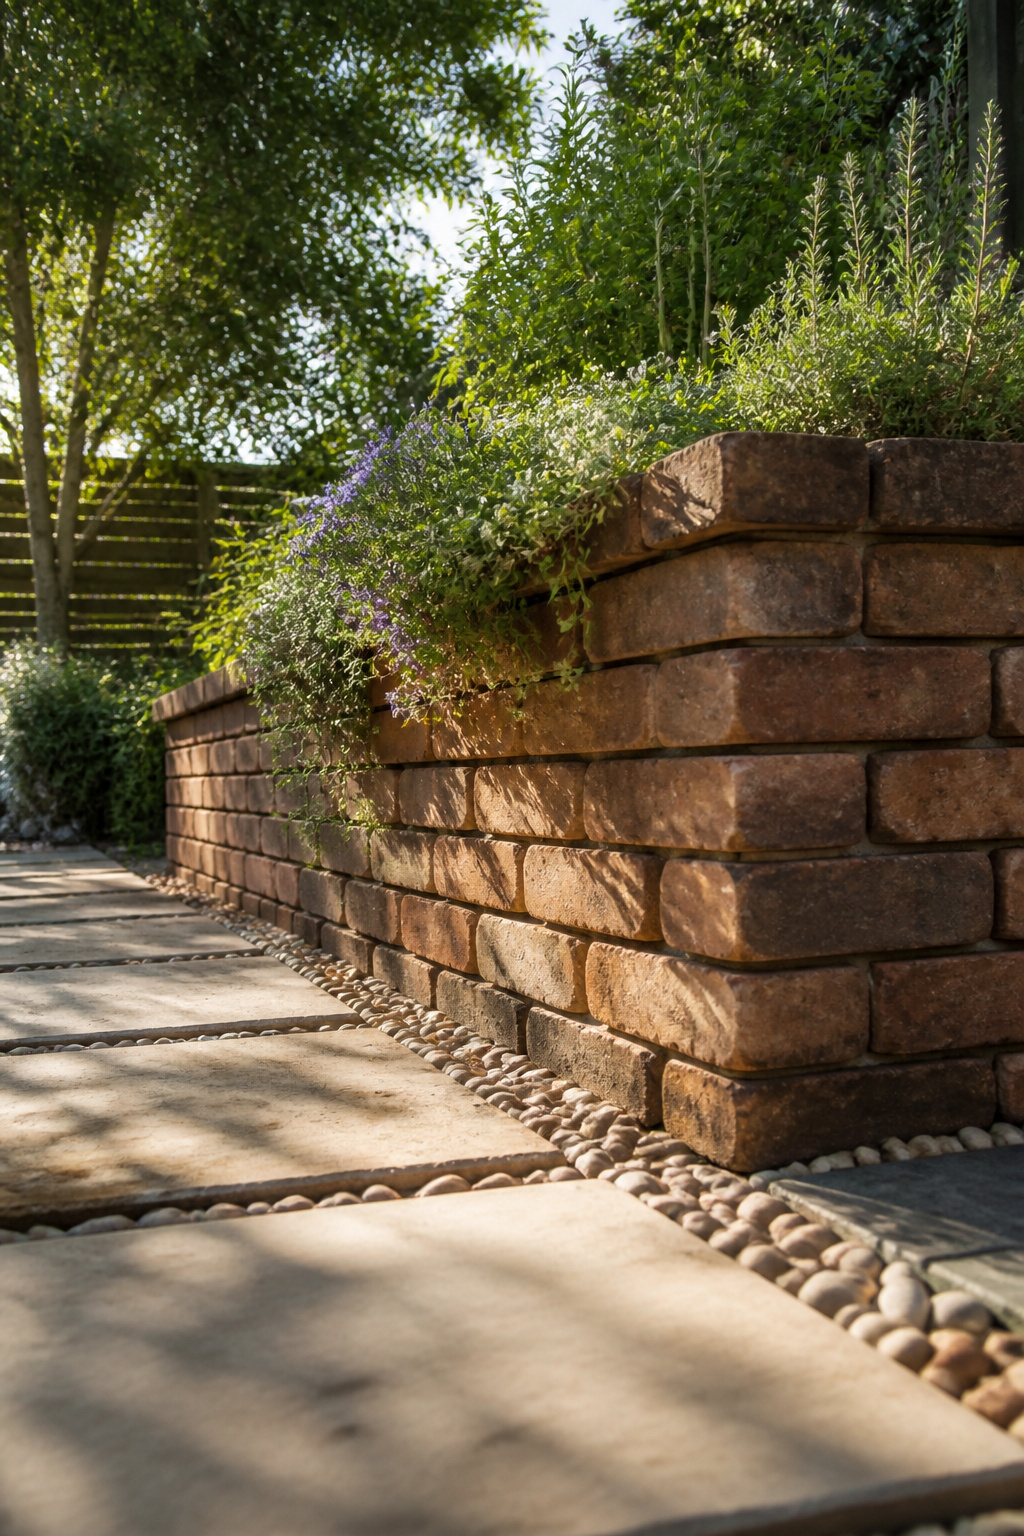
A raised brick bed stops being edging once it passes 12 inches tall, or wherever the grade drops more than 6 inches across the length of the bed. At that height it is a retaining wall, and retaining walls hold water pressure against their back face the way a flat border never has to.
The grade change is what pushes the decision. A single course of brick on level ground sheds rain to both sides and the soil behind it breathes. Stack three or four courses to hold a slope and the water that seeps through the bed has nowhere to go but against the brick, saturating the soil and freezing in winter. Freeze-thaw cycles bulge the wall outward, or tilt it, or push individual bricks off their bed.
Bricks for this job need to be rated SW, severe weathering. They are fired at higher temperature, less porous, so they do not absorb the water that would let them crack and spall when it freezes. Using interior-grade or moderate-weathering brick here is the costly mistake I made once on a short slope by the driveway. Two winters and the faces flaked.
What I forgot on that same wall were drainage weeps: small gaps left open in the mortar or dry-stacked joints at the base, or a run of perforated pipe behind the wall, to let water out before pressure builds. Without them the wall pushed forward by spring. The weeps are not decorative; they are the detail that lets the structure survive as long as the brick does.
19. Brick Edging Around Raised Beds
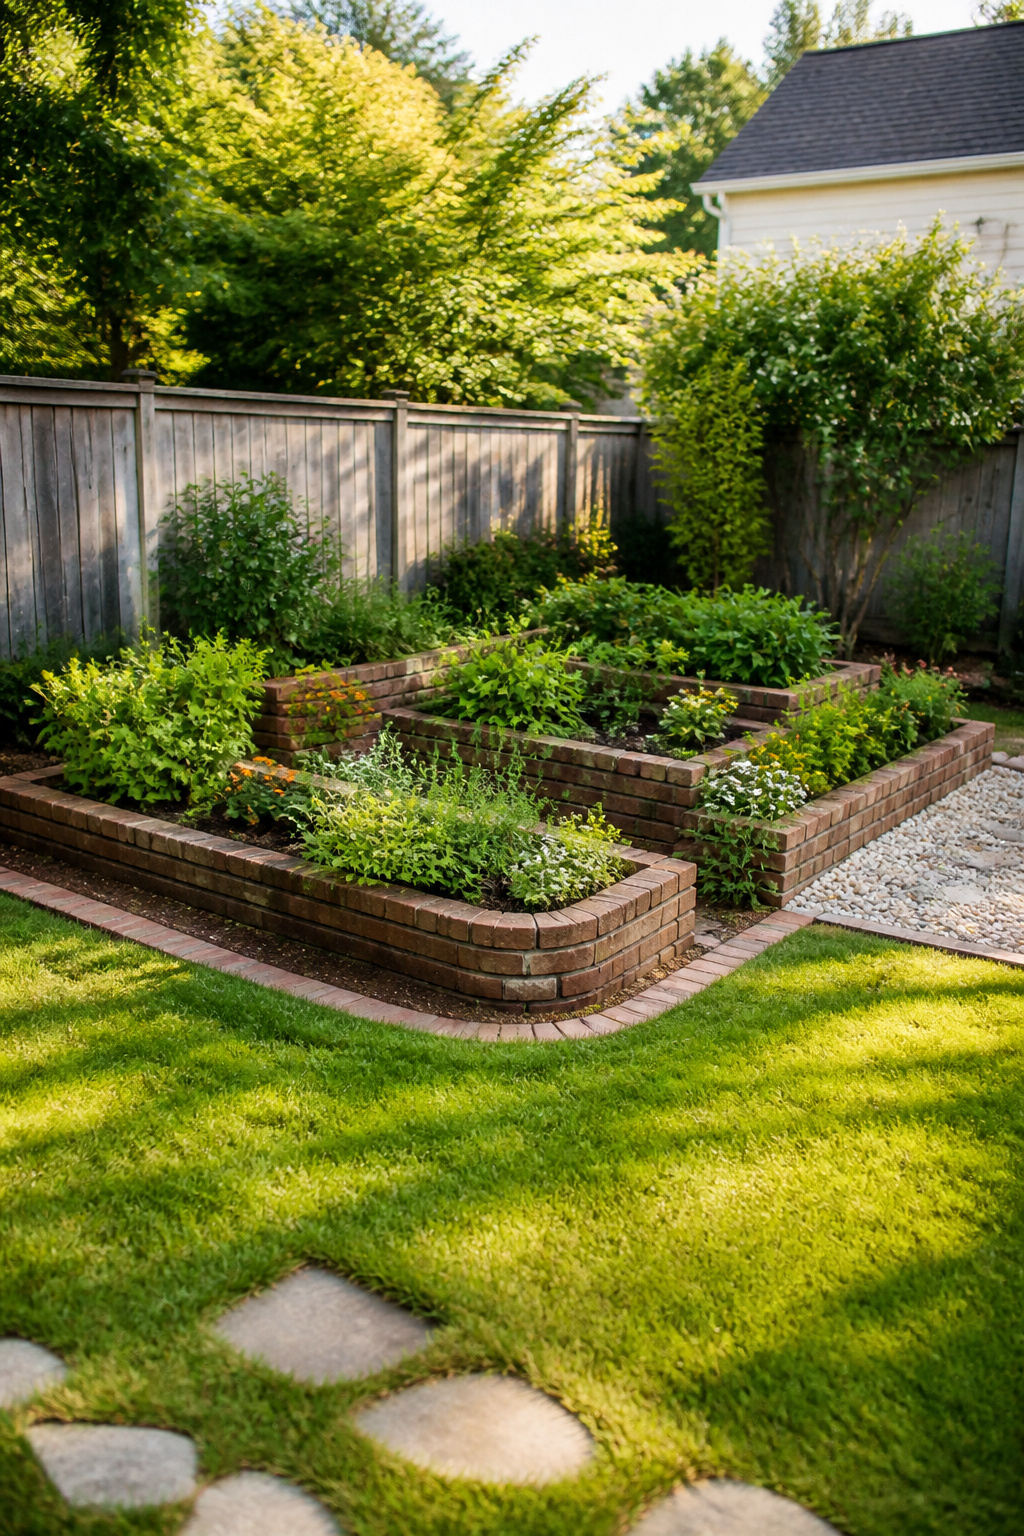
A raised bed built from utilitarian lumber or corrugated metal does the job, but the raw edge where bed meets path collects soil and never quite looks finished. The frame around the box, not the box itself, is what solves this. Bricks set in a low perimeter raise the visual line without raising the bed; the construction stays practical while the border gives it intention.
Stacking two courses, as with double-stacked brick edging, adds just enough height to hold mulch in place and create that raised-border effect without the cost of building the entire bed taller. Neat stacking reads formal; a looser stack suits a wilder planting style. Either way, the brick acts as a barrier that prevents soil and mulch from spreading onto the path, and the clean edge guides a mower or reduces trimming.
What convinced me, reading through the examples, is how this treatment rescues beds that are already built. You are not rebuilding; you are defining.
20. Brick and Gravel Edging Combo
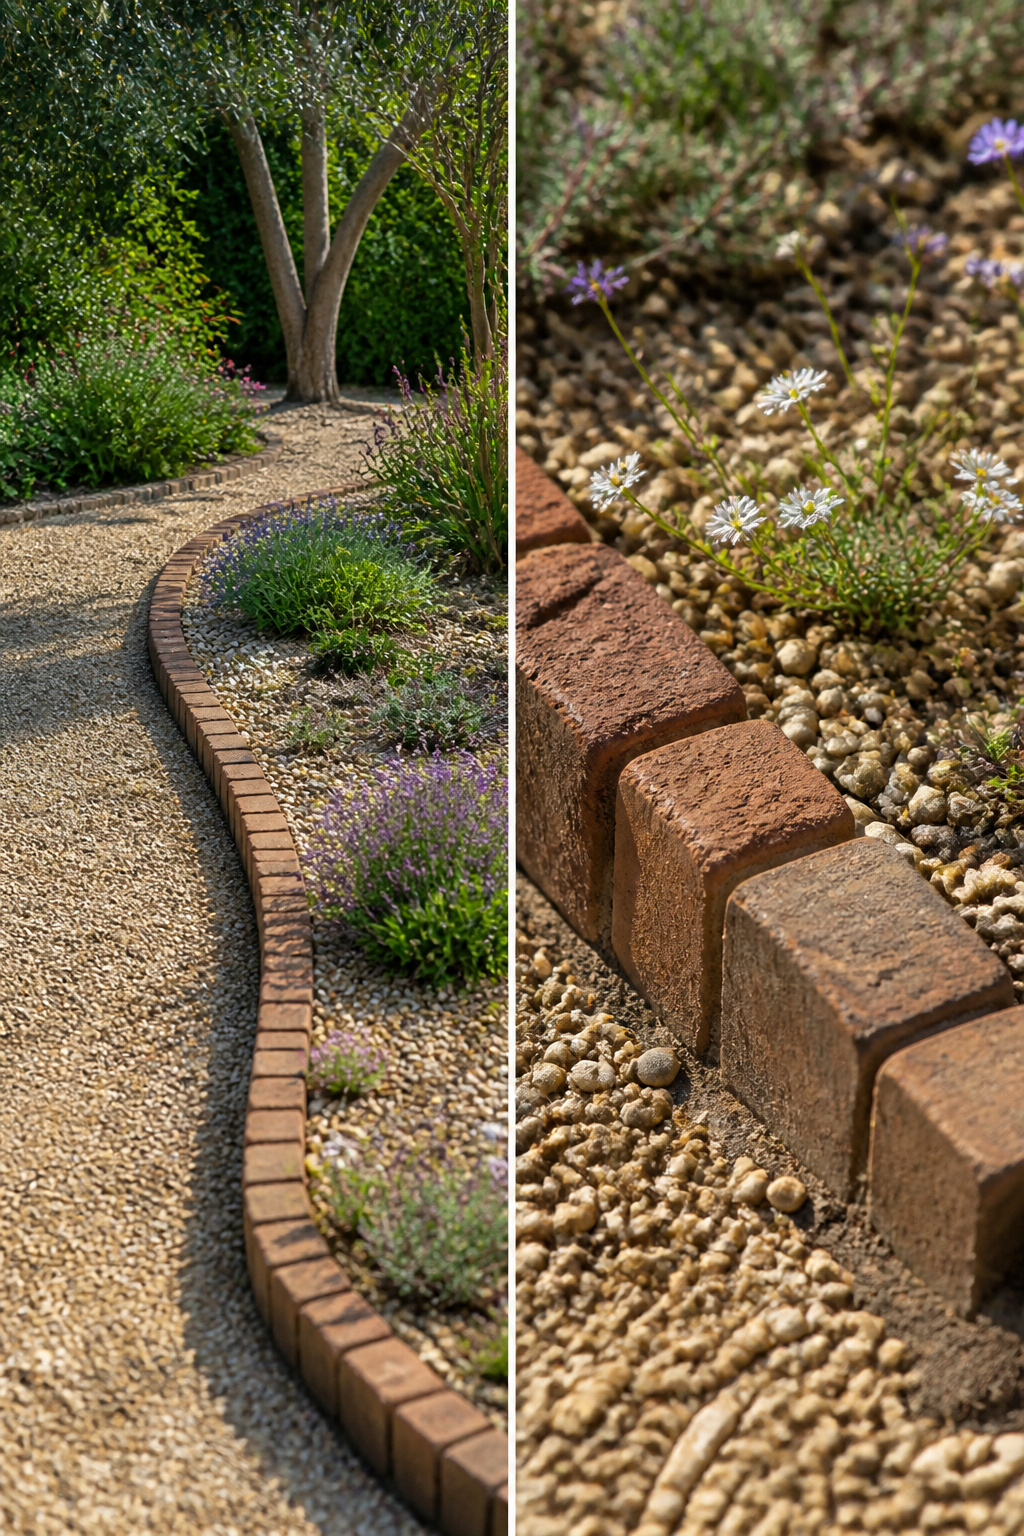
A brick soldier course set on edge, half buried below grade, with gravel mulch filling the bed inside it, gives you two textures and a clear line that actually does work. The gravel drains fast, so water does not pool against the brick after heavy rain, and that drainage base of compacted crushed stone under the brick itself keeps the row from heaving in freeze-thaw cycles. I have seen this pairing run between lawn and perennial bed, and also as a narrow gravel strip between the brick and the grass, which lets you mow right to the edge without scalping plants.
The maintenance is not zero. Weeds seed into gravel more readily than into soil, and the ones that take hold need pulling before they root through the fabric underneath. Brick without a tight sand joint or polymeric lock can also shift if the base was skimped; roughly half the brick sitting below grade is what keeps the line straight year over year. The contrast reads as intentional, not makeshift, but only if the gravel stays topped up and the edge stays crisp.
21. Crushed Rock Between Bricks
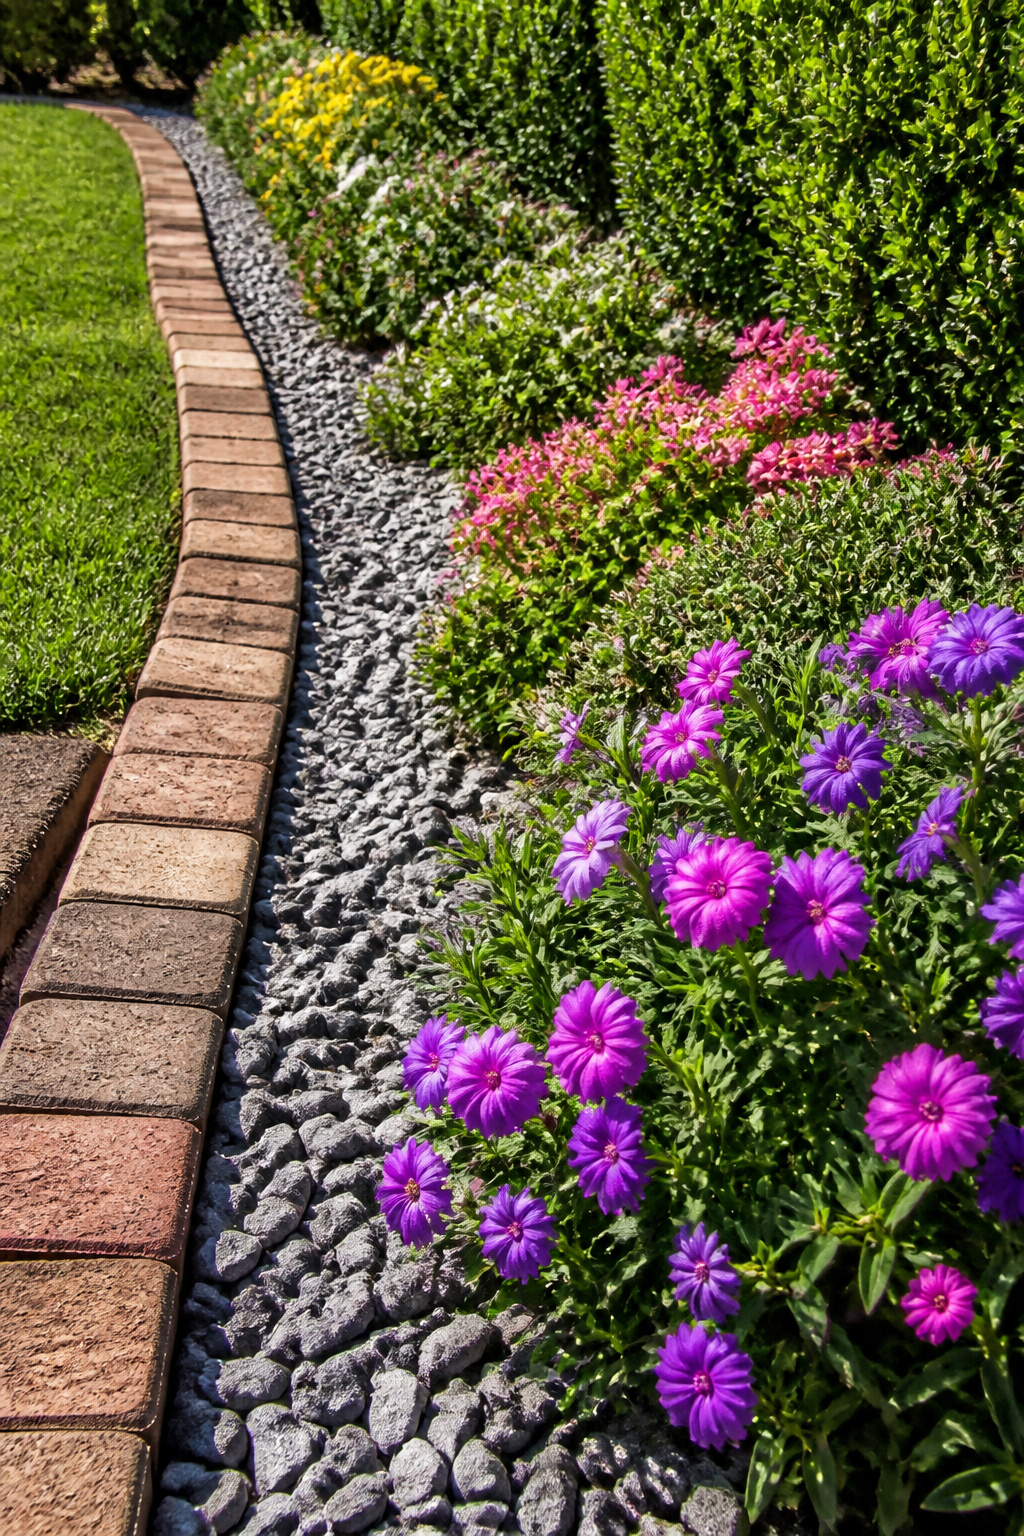
Crushed rock read as the main event in this design, with bricks acting as punctuation rather than the border itself. The look works best on a scale of at least four feet; anything narrower and the rock overwhelms the line you’re trying to draw. I used 3/8-inch crushed stone, which stayed put under a hose but still let me rake it level after heavy rain.
Two arrangements carry the idea. In one, bricks stand on end like dots spaced every foot through a rock field. In the other, bricks lie as headers in a shallow trench, edge to edge, with rock packed between them. The second reads more like a woven texture; the first reads looser.
Washout was the lesson I had to learn twice. Without a slight lip or a buried first course on the downhill side, a hard rain carries the top layer straight into the lawn. Raking it back every spring counts as maintenance, not a one-time fix. A strip of landscape fabric underneath slows the migration but does not stop it entirely.
22. Brick Pathway Garden Edge

A brick pathway that already cuts through your yard can handle border duty without adding a single new paver. The trick is deciding whether the path edge itself becomes the bed line, or whether you widen the path by one course so the outer row serves as edging while the inner rows stay walkable. Either approach keeps the visual line clean, because the brick color and jointing already match.
The first option, planting tight against an existing path, works when the path was laid with a proper base. A compacted gravel layer two to three inches deep plus an inch of sand bedding, edge restraint included, keeps the soldier course from drifting into the bed over time. Without that restraint, freeze-thaw cycles in northern zones push bricks outward, and the neat division between walkable and planted slowly disappears.
The second option, widening by one course, demands more foresight. That outer course needs the same gravel base and edge restraint as the main path, or it will settle independently. I have seen paths where the added edge row sank two inches in a single season because it was simply laid on top of loosened soil. The step down collects water, weeds colonize the gap, and the whole point of using brick is lost.
Clay bricks rated SW for severe weathering hold up where winters are hard; concrete pavers do the same job at lower cost but check the density. Low-porosity material resists the spalling that shows up as surface flakes after a few freeze cycles.
23. Gabion Wall Edging
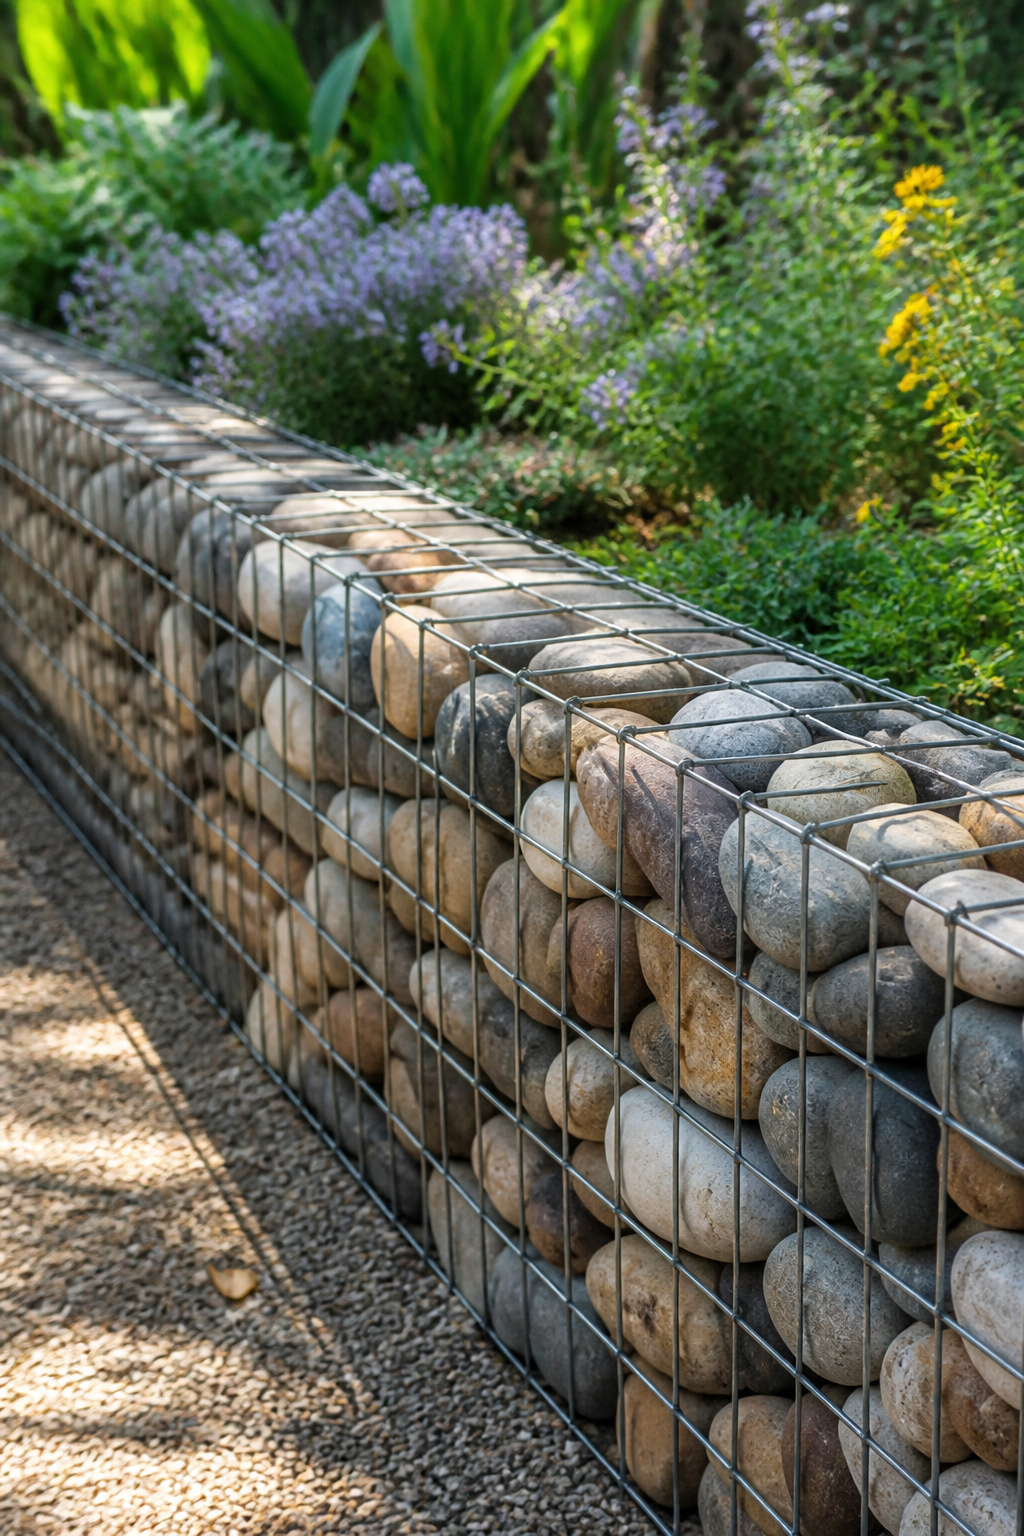
A gabion wall is a wire mesh cage filled with rocks, and the combination of industrial grid and raw stone gives it more visual weight than any other edging on this list. The wire itself matters: galvanizing keeps rust at bay, but the thicker the zinc coating, the longer it lasts in wet soil. Mesh openings need to be smaller than your smallest rock or the fill will simply spill through the face. I have seen walls built with baseball-sized stone hold cleanly in 3-inch mesh, while pea gravel demands a much tighter weave to stay put.
This is not a Saturday project you knock out between coffee and dinner. The cages arrive flat and need to be wired together into continuous runs, the fill must be placed by hand or machine in lifts so the face does not bulge, and a run of any length means moving literal tons of rock. Cost runs accordingly: the mesh, the stone, and the labor, whether yours or hired, push this well past the price of a simple brick course. What you get for that investment is a retaining edge that reads as architecture, not just boundary. If your bed needs holding back more than six inches of soil, or if you want the border to be the thing people notice first, the gabion earns its place. For a low annual budget and a small patio, it is probably the wrong drama at the wrong price.
Installation Base and Depth

A trench six inches deep is the minimum across every brick and rock style I looked at, whether the edge sits flush or half-buried. That depth lets you build the base in layers: two to three inches of compacted gravel or crushed stone first, then an inch of sand on top.
The gravel matters more than most beginners expect. Water that collects under the bricks freezes, expands, and pushes everything out of line by spring. The sand layer above it is only for leveling; it drains poorly on its own, which is why the gravel has to sit below and carry water away.
Brick choice turns out to be just as important as the base in cold climates. SW-rated bricks, the severe weathering grade, are dense enough to survive freeze-thaw cycles without the surface spalling off. Standard bricks absorb more moisture and crack within a couple of seasons in zones with real winters. The extra cost per brick is low; replacing a failed edge is not.
Polymeric Sand and Final Lock
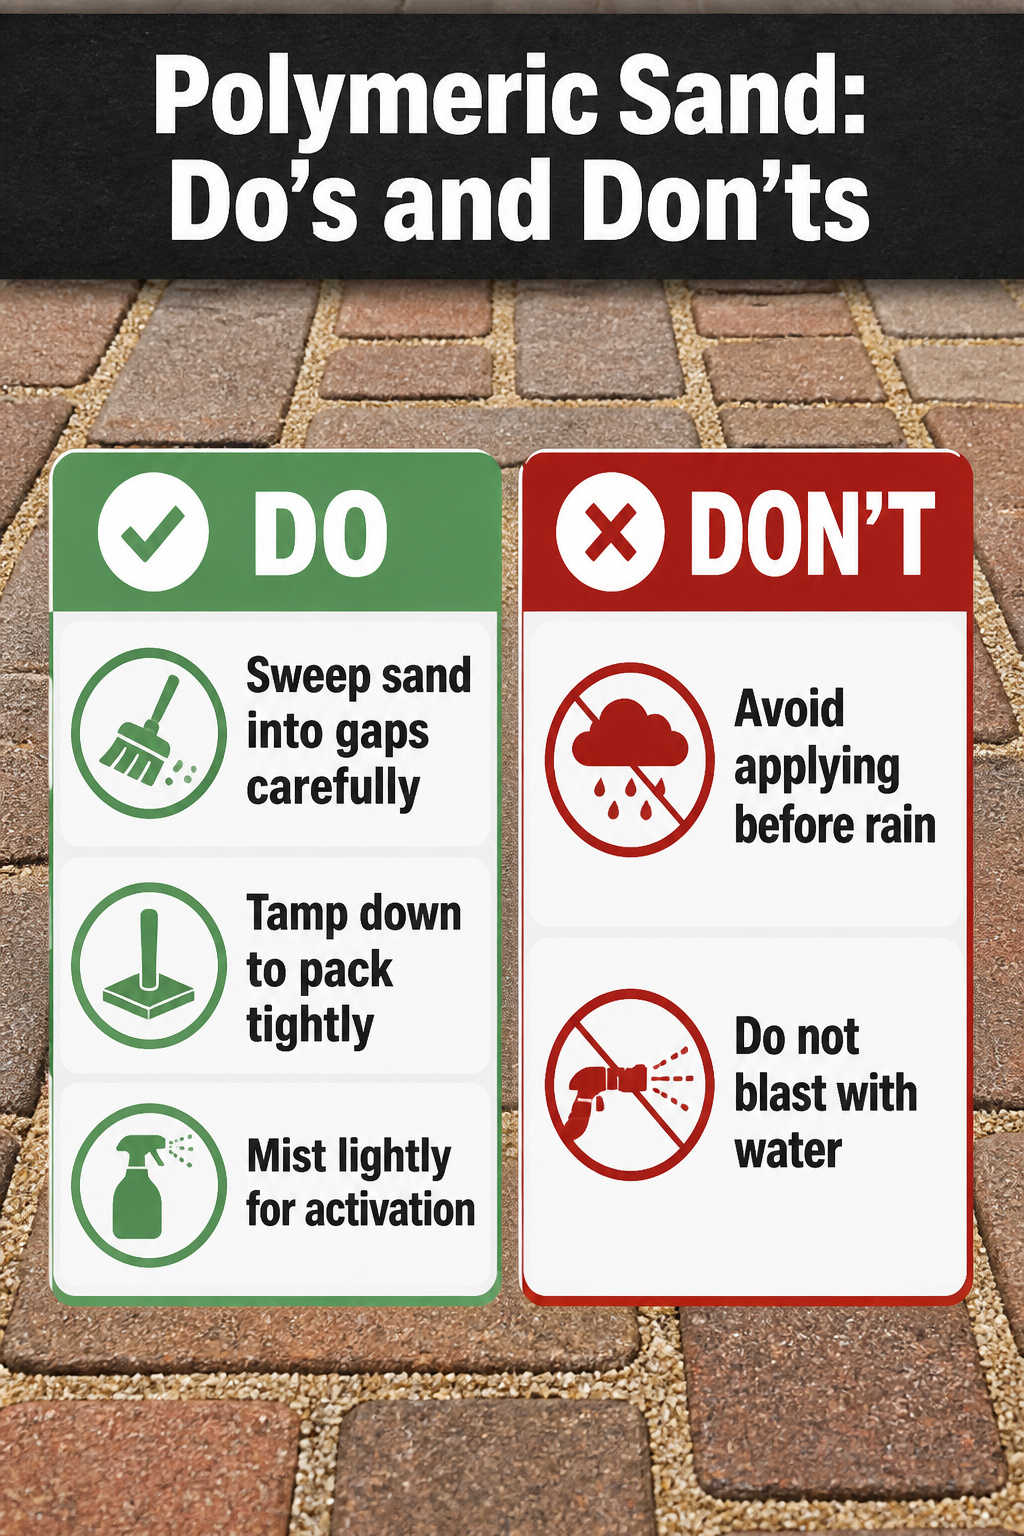
Polymeric sand is what turns a line of bricks into a solid edge that stays put through freeze and thaw. The sand gets swept dry into the gaps, then the bricks get vibrated or tamped so the grains pack tight and flush with the faces. Only after that do you mist the surface to activate the binder. Apply it only when the forecast is dry for the next couple of days. I misread a June sky once, spread the sand at noon, and watched a thunderstorm turn the surface into a milky haze that bonded to the brick like thin grout. The fix was an acid wash, gloves, and a Saturday I had not planned to spend on my knees. Roger Cook’s advice on this is simple: moisten, don’t blast. A gentle spray sets the joint without washing the sand back out.
Plant Pairings That Soften the Edge
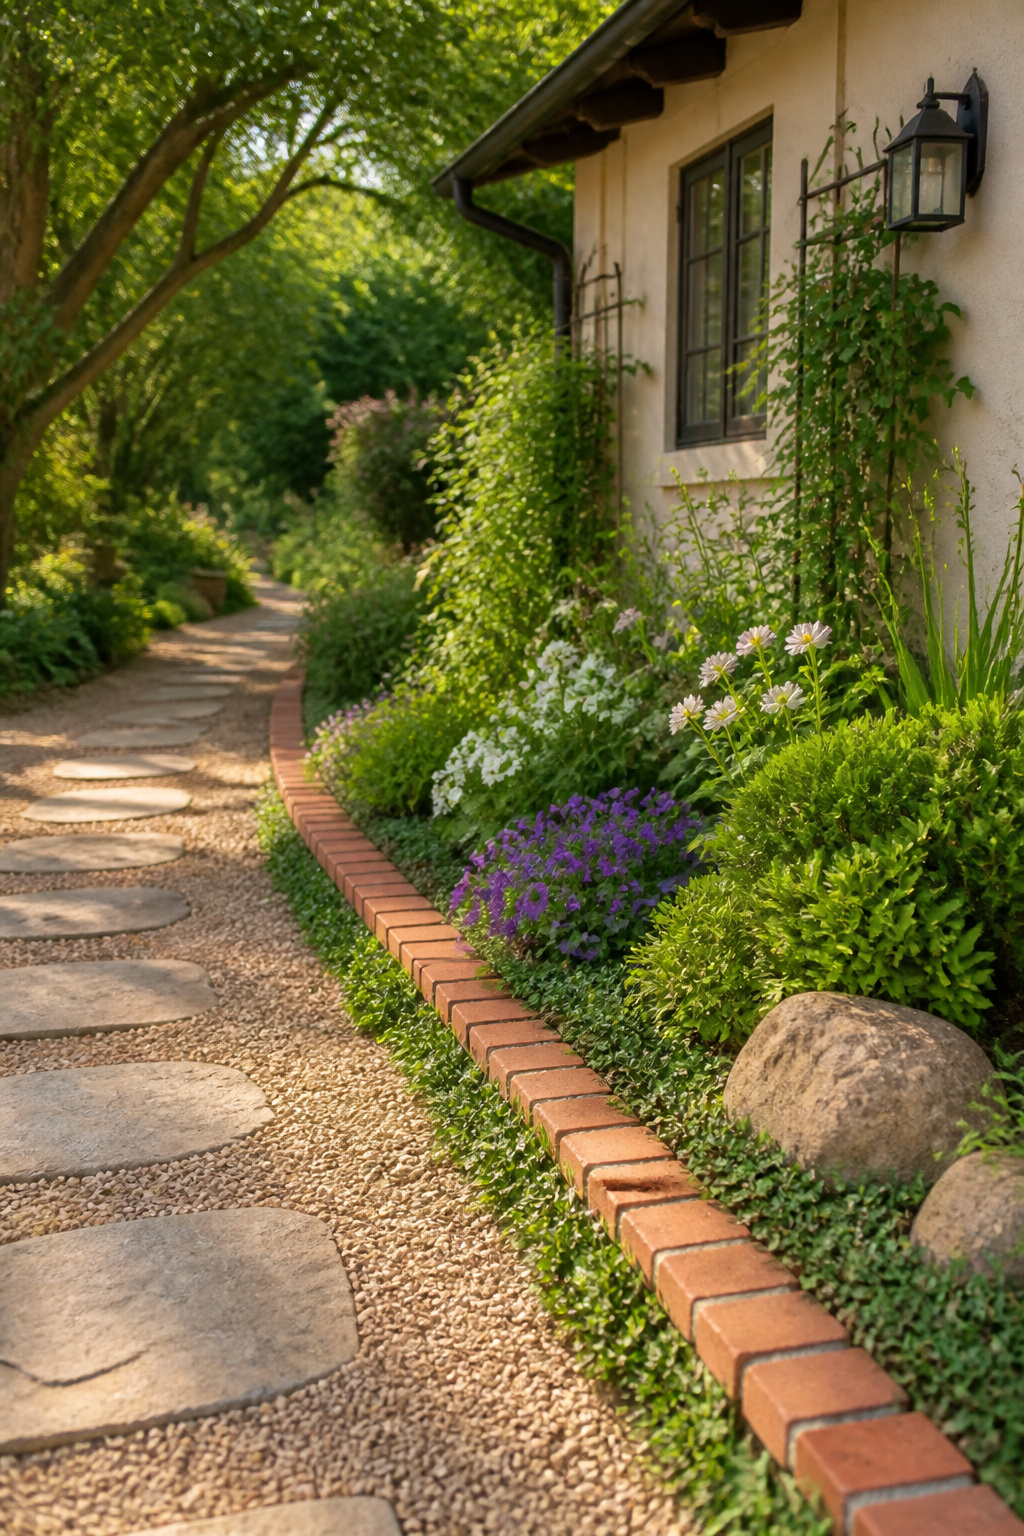
Creeping fig against half brick edging taught me the pairing rule I still apply to every border I plan. The vine’s tiny, leathery leaves stay under four inches tall and spread flat to the ground, so the clean brick line stays readable from across the lawn. Low evergreen ground cover against crisp brick gives you structure with softness; let anything taller than six inches sit one foot back from the edge or it reads as a wall, not a frame.
Rustic rock calls for a different plant. Where the edge itself is irregular, spilling perennials like thyme or dianthus let their stems trail over the stone and knit the seam into the bed. The rock looks deliberate because the plant is casual; both things have to move in opposite directions for it to work.
Height at the edge is the mistake I see most often. A boxwood ball or a clump of iris sitting right against the border blocks the view of the border itself, and you have spent money on material no one can see. Keep the edge line clear for at least its first six inches inward; that narrow strip is what separates a garden from a field.
Frequently Asked Questions
What are some creative garden edging ideas with bricks and rocks?
Double-stacked brick edging adds height and works as a low retaining wall, while single flat-lay bricks keep attention on the plants. For softer lines, curved or wavy brick borders suit cottage gardens, and circular brick rings frame specimen trees or fountains. Mixing smooth rocks with bricks creates a natural, organic look that blends into the landscape.
How deep should I dig for brick edging?
Dig at least 6 inches deep for most brick edging installations. This depth lets you bury half the brick below grade while leaving room for 2 to 3 inches of compacted gravel plus an inch of sand or stone dust to level on. That anchorage prevents heaving through freeze-thaw cycles.
What type of bricks are best for outdoor garden edging?
Choose bricks rated SW, meaning severe weathering grade, for any outdoor edging. They are fired hotter and denser, with low enough porosity that water stays out of the body. Standard builder bricks absorb too much moisture and will pop loose or spall faces after winter freezes.