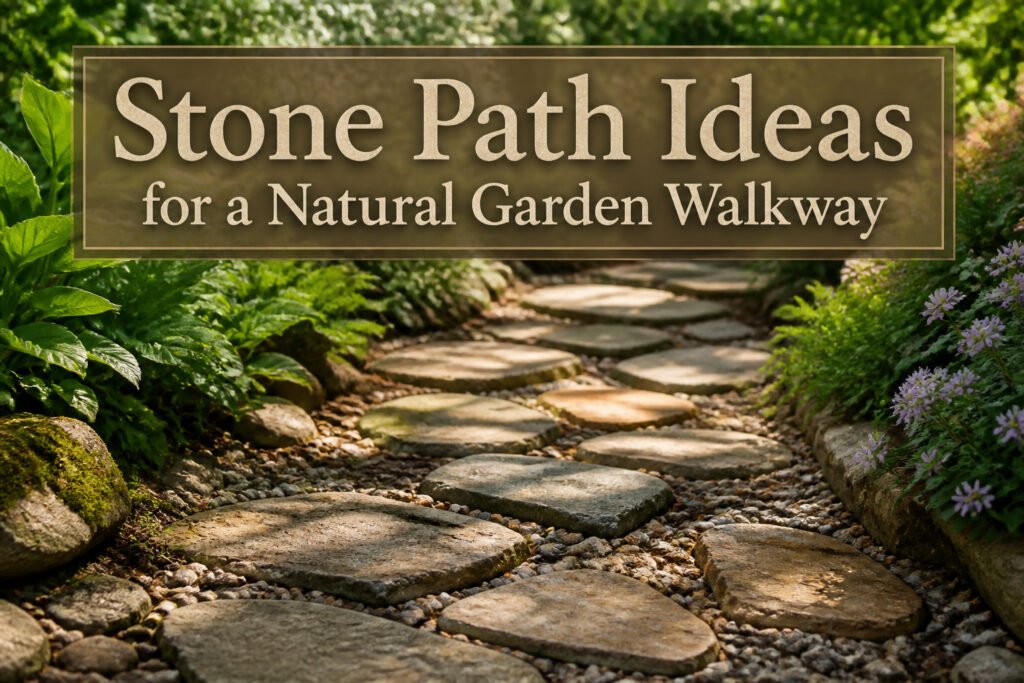
Stone paths run from a few bags of pea gravel and reclaimed slabs to architectural slabs set in stone dust, and the right choice depends almost entirely on how much traffic the route takes. A floating line of irregular sandstone suits a garden bench you visit on weekends; granite laid on six inches of compacted base is what survives the daily haul to the shed. One detail I learned the hard way: set stones slightly deeper than looks right at first. They settle, and a stone that starts flush ends up proud of the surface within a season.
1. Garden Stepping Stones
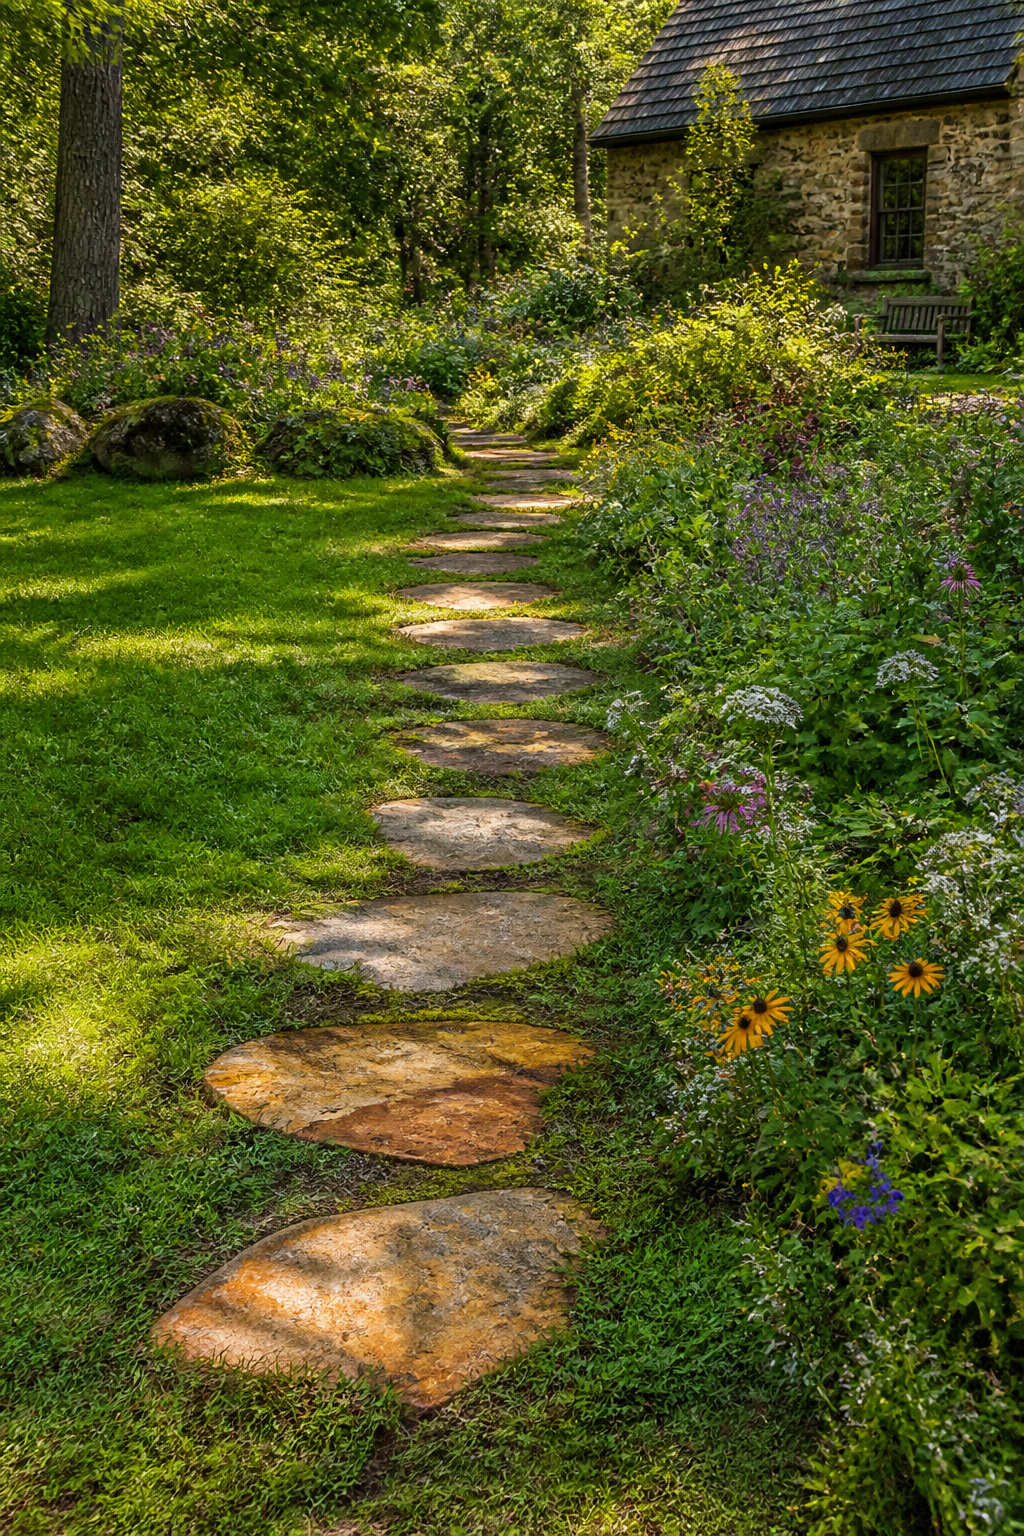
Flat stones like sandstone, slate, or limestone give a path the kind of irregular, weathered look that reads as genuinely rustic rather than designed. The stones’ natural variation in shape and thickness works with lawns and garden beds instead of fighting them, which is why this style suits informal layouts so well. You feel the difference underfoot too: the slight give of soil at the edges, the coolness of stone that hasn’t been machined smooth.
Space the centers 18 to 24 inches apart for a comfortable stride without the stutter-step that closer spacing forces. Wider than that, and the path starts to feel like an obstacle course, especially after rain when the ground between softens. I like the floating effect this spacing creates, each stone sitting like an island in grass or gravel, though I have learned to set them slightly deeper than looks right at first. They settle, and a stone that starts flush ends up proud of the surface within a season. For a softer finish, moss or low ground cover planted between the gaps will colonize on its own in shade, or you can speed it along with plugs in spring.
2. Stepping Stone Walkway Ideas
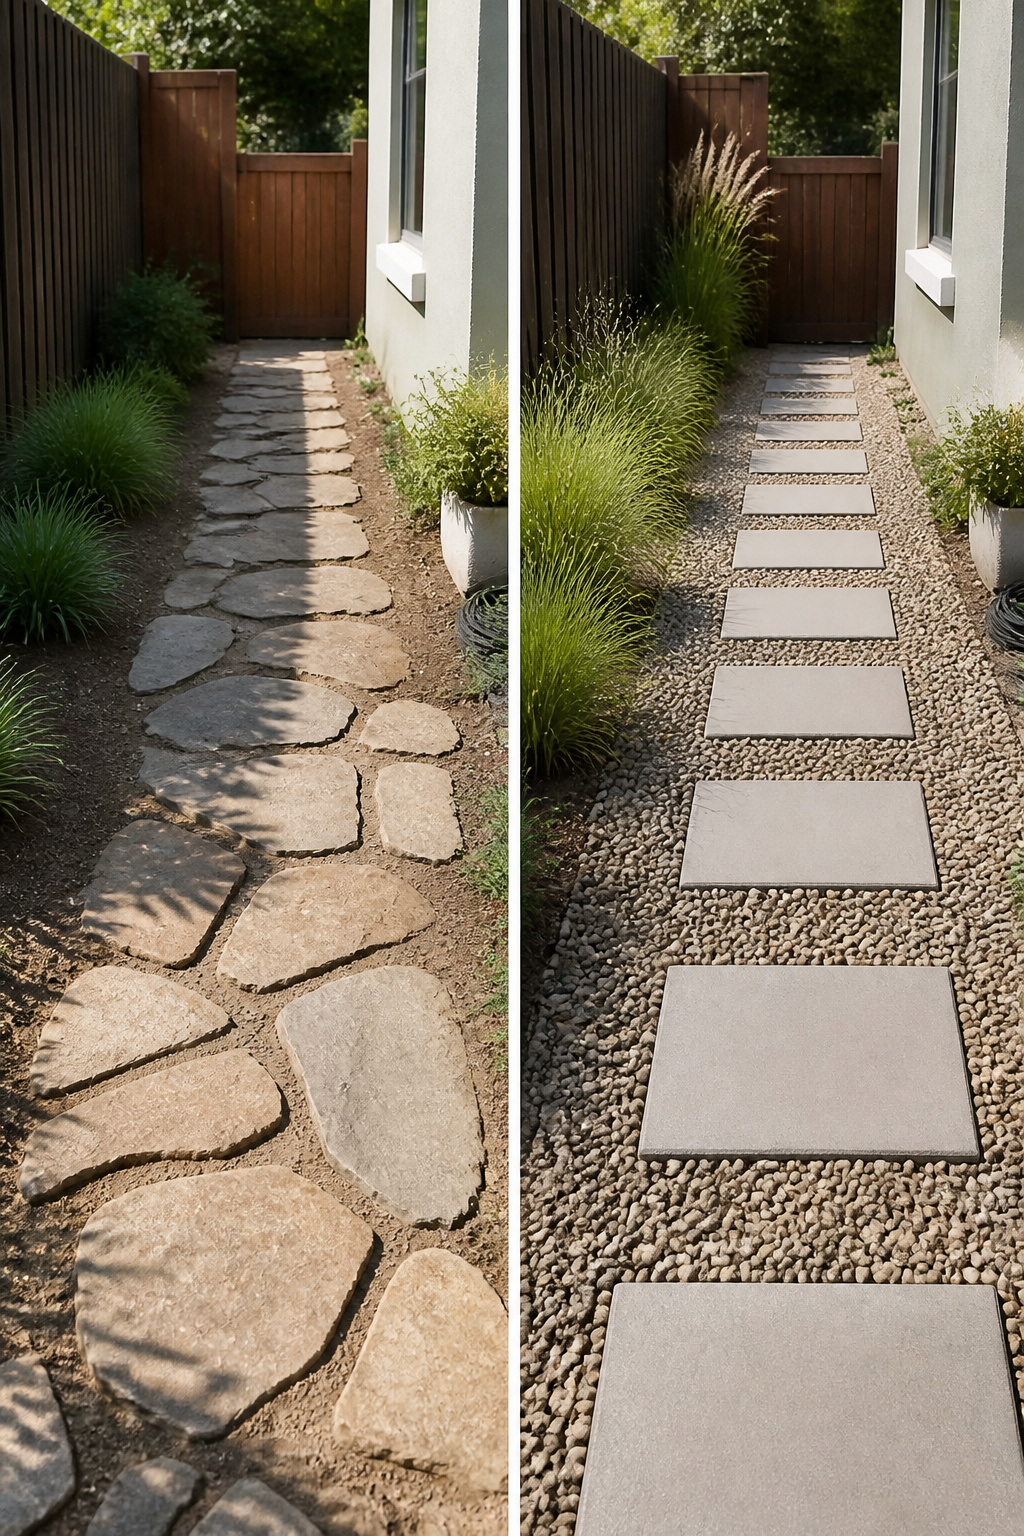
Geometric cut stones dropped into a bed of pea gravel give a small garden path a clean, deliberate look without the cost of full paving. The stones provide solid footing; the gravel fills the gaps, locks everything in place, and drains well enough that the path stays usable after rain. Pea gravel runs $1 to $3.15 per square foot, so the material cost stays modest even when you are working a curved line to make the space feel larger than it is.
The contrast between the smooth, regular stone and the rough, loose gravel is what makes the pairing work visually. I like to set the stones slightly below the gravel line at first, then sweep and tamp until they settle flush; that keeps the surface stable and prevents the gravel from migrating onto the stones with every step. For a more modern feel, stick with squares or rectangles rather than irregular flagging. The geometric cut reads as intentional even when the path itself wanders.
3. Natural Garden Paths
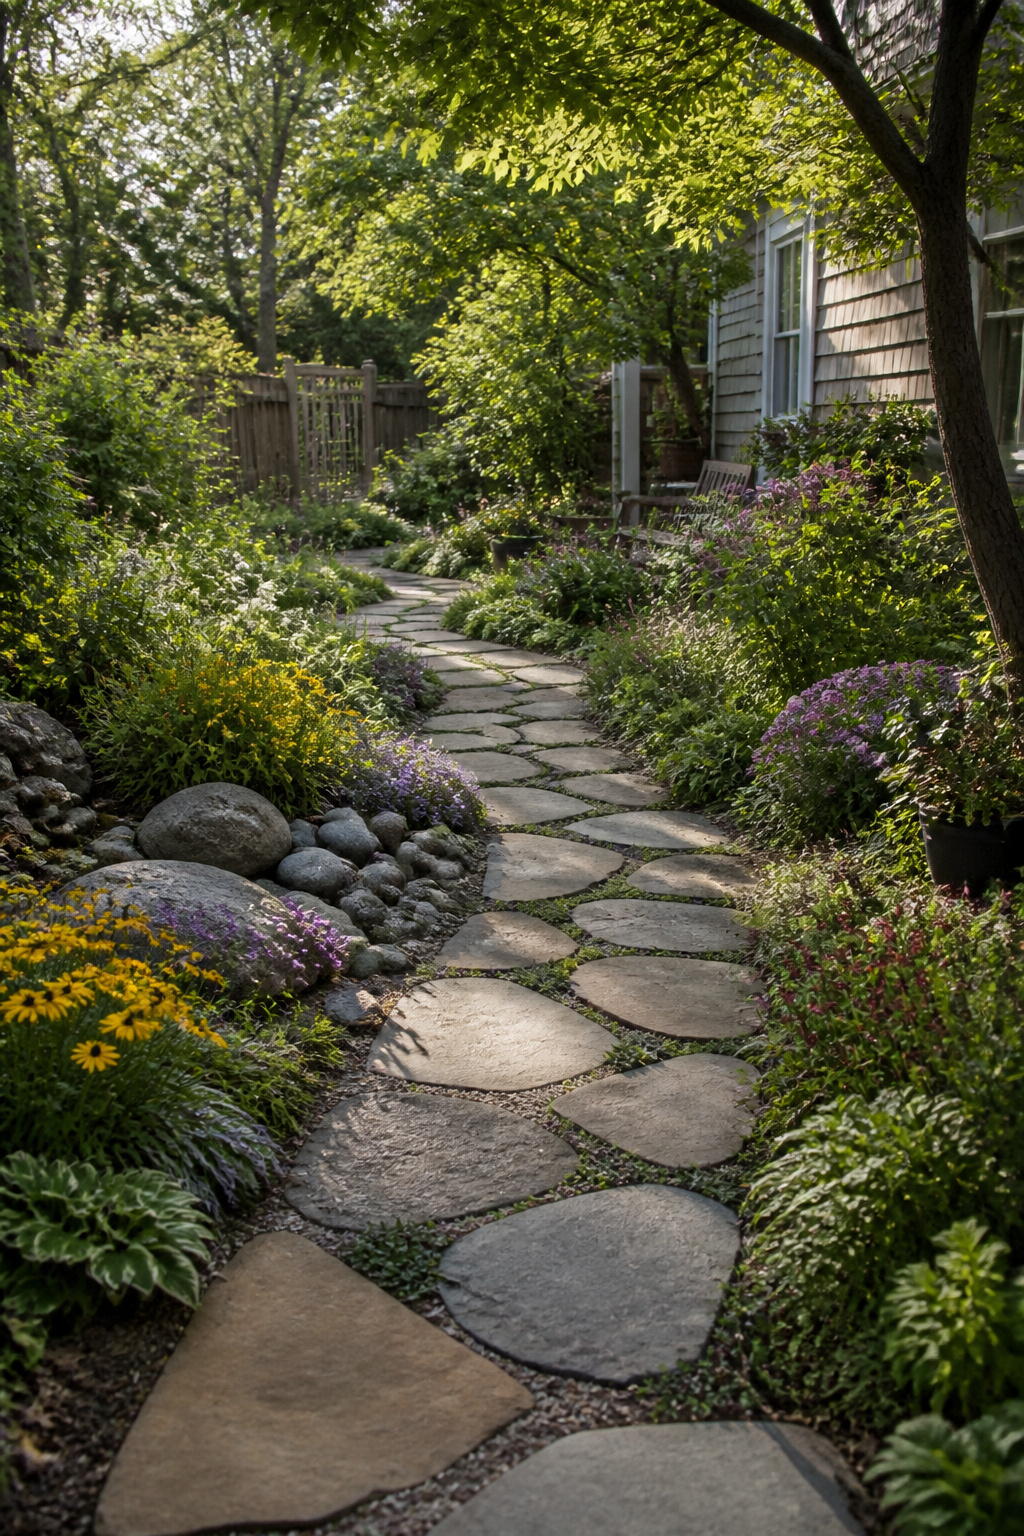
Sandstone and granite are the two stones I keep coming back to when a path needs to feel like it grew there instead of being laid down. Sandstone shifts warmer over the years, its surface softening at the edges until the grain looks like something water wore smooth decades ago. Granite does the opposite: it stays stubborn, but the polish dulls to a matte that catches morning light differently and hides the scuff of boots far better than anything refined.
A path laid with irregular slabs reads as a garden feature rather than a sidewalk, which matters when your yard is small enough that every hard line steals space from the planting. I set mine with gaps wide enough for thyme to creep in, and now the stone and the greenery argue over the edges each spring. The irregular shapes let you adjust for roots or slope without looking like you adjusted; the path simply bends to accommodate what was already growing.
For the heavy-traffic stretch from the back door to the shed, granite handles the freeze-thaw cycles without the cracking I’ve seen in thinner materials. Sandstone works better for the secondary routes, the ones to the bench or the compost, where foot traffic is lighter and you want that cottage-garden softness. Neither stone needs the weed-barrier fuss of gravel; a compacted base and tight joints do the actual work.
4. DIY Garden Paths
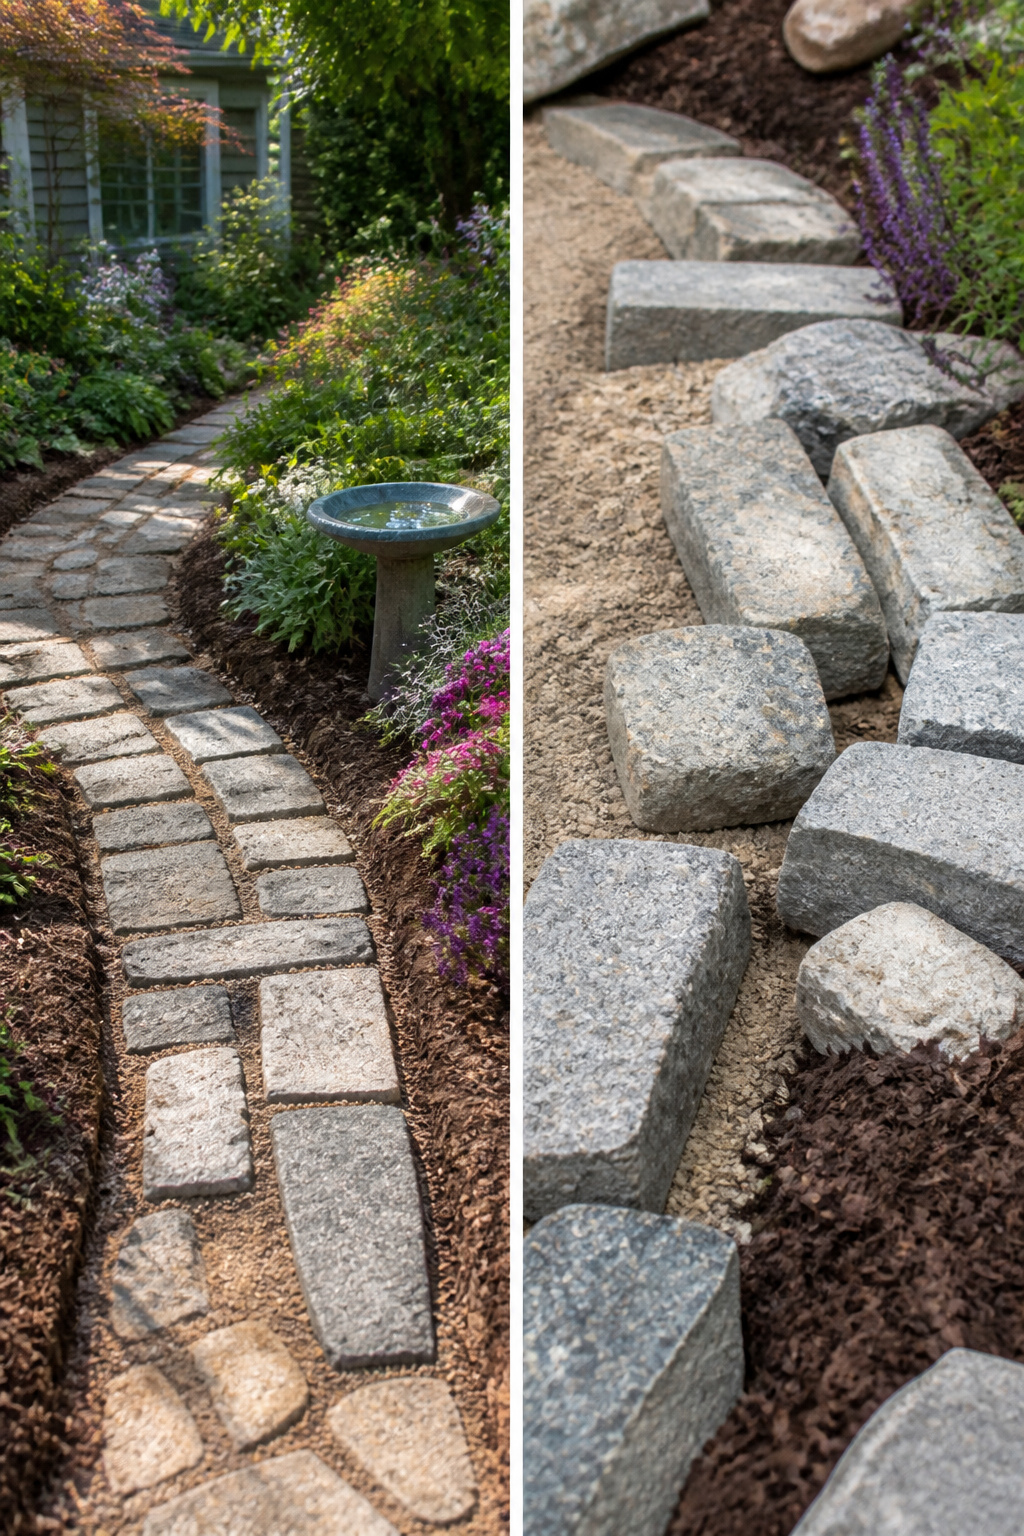
Leftover stone from a neighbor’s patio teardown or a construction site pile can become a path for the cost of hauling it home. I have seen reclaimed granite curbstones from a road project laid on edge like dominoes, and broken concrete slabs, sometimes called urbanite, set in sand to read as flagstone from a few feet away. The look is irregular by nature, which forgives uneven ground better than cut material does.
For a more uniform stepping stone, DIY flagstone molds let you cast concrete in whatever shape you need. Fill the mold with a dry-mix concrete, vibrate the bubbles out by tapping the sides, and let it cure for two days before demolding. Thicker castings, two inches or more, hold up to foot traffic without cracking.
Mulch paths cost almost nothing to install but need replacement every year or two as they decompose and wash away. A single row of flagstone set into the mulch slows the decay by carrying most of the foot traffic.
Whatever surface you choose, the base matters. Excavate three to four inches, lay landscape fabric to block weeds, then add and compact a layer of sand or gravel before setting stone. A path laid directly on soil shifts and sinks; the extra afternoon of prep is what separates a walkway that lasts from one that needs relaying after the first hard rain.
5. Modern Stone Walkways
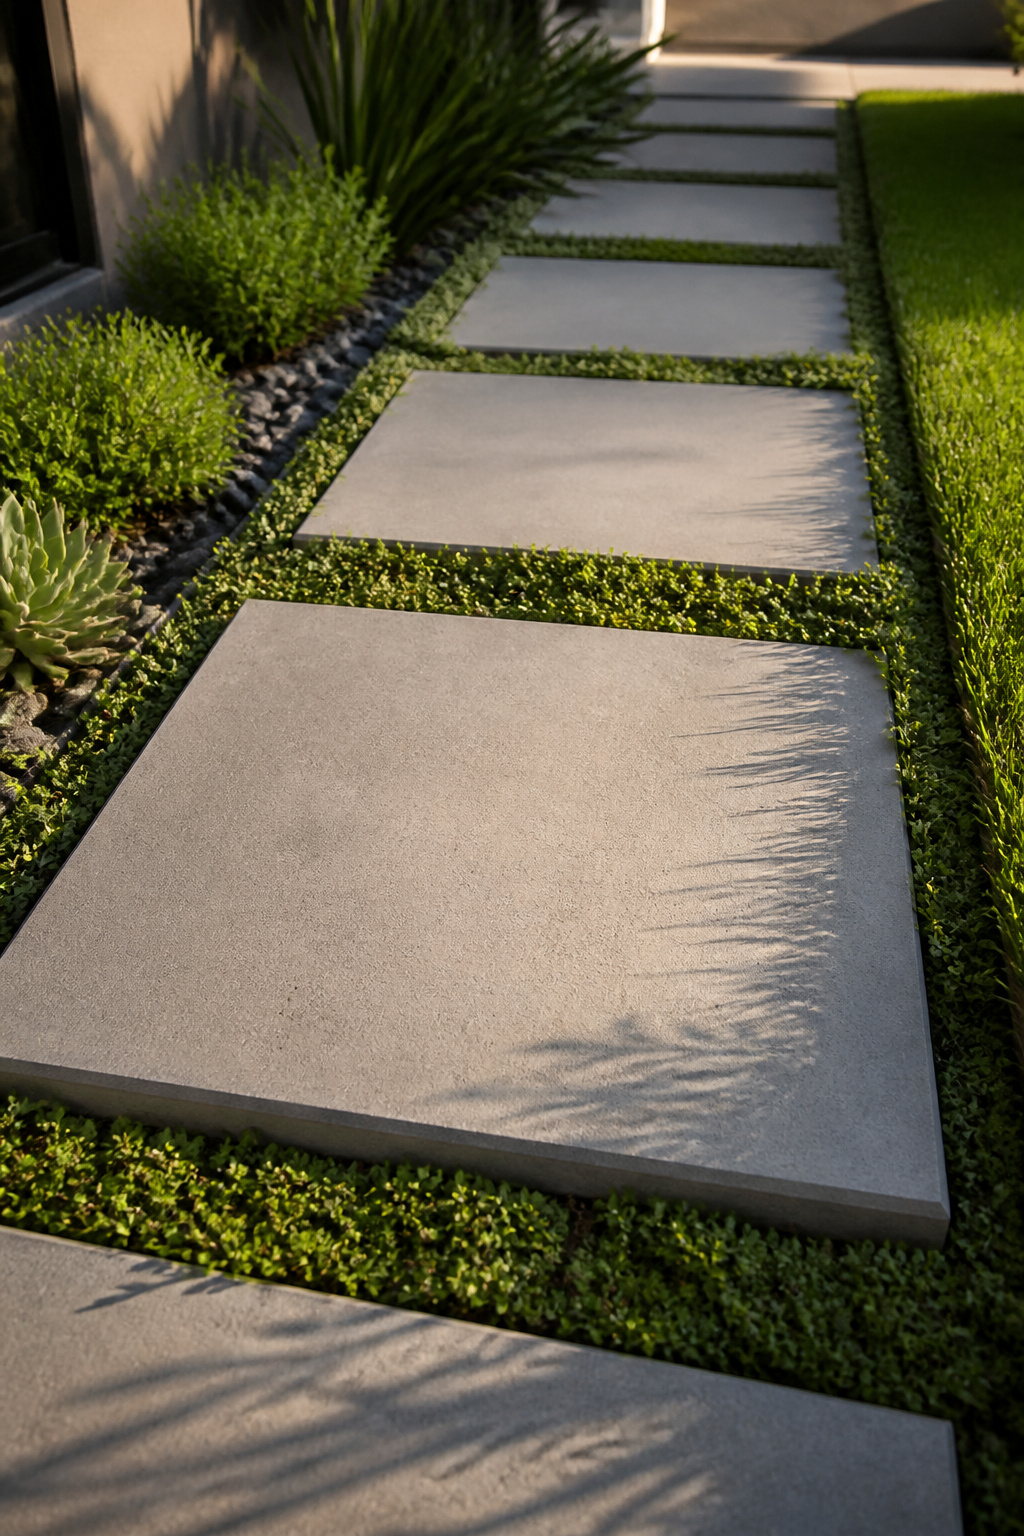
Large-format slabs read as intentional where busy patterns would feel cramped. An 18-by-18 inch architectural slab laid with ground cover between the joints gives a slim side yard the same quiet confidence as a broader landscape. Concrete slabs work here too, either poured in place or set into mulch for that same uncluttered look at less cost. The clean edges suit contemporary architecture, but the real advantage for a small space is restraint: fewer pieces, less visual noise, more room for the eye to rest. Slate pavers in a well-kept lawn achieve something similar without the formality of concrete borders. I would skip the lighting some guides suggest unless you actually walk the path after dark; in a tight yard, a single misplaced fixture breaks the simplicity you built the whole design around.
6. Low Maintenance Paths
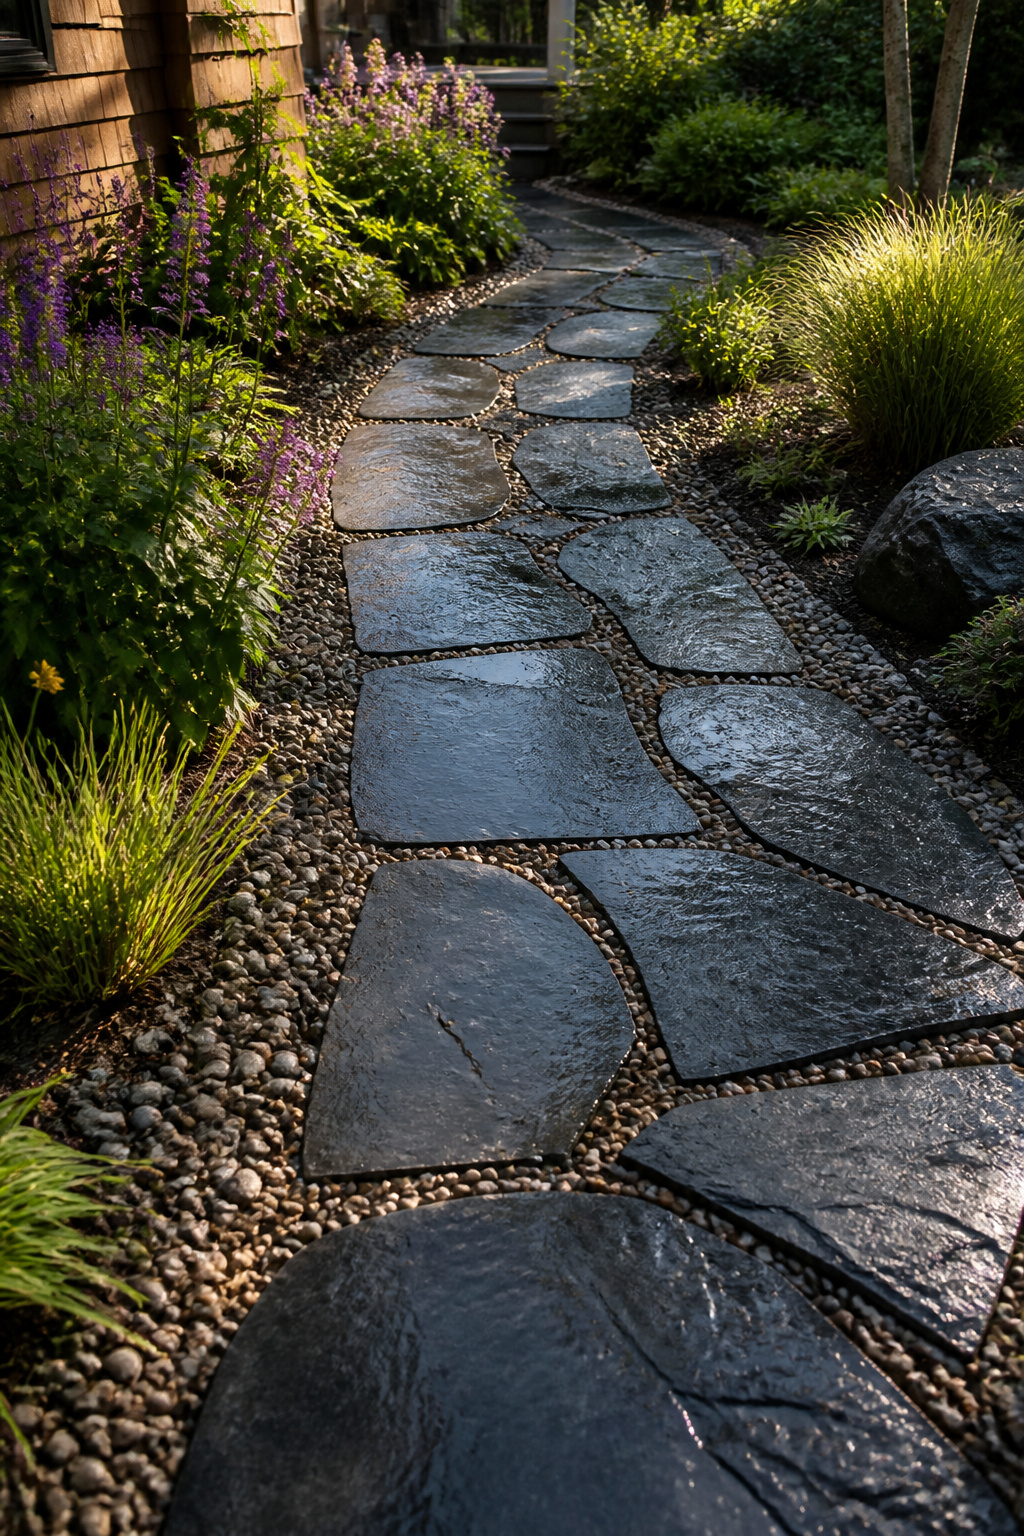
Gravel borders around stone paths do more than look tidy; they block weeds from creeping into the walkable surface, which saves hours of pulling later. I learned that the hard way on a slate path I laid without one, where grass colonized the joints within two seasons. Proper drainage and a weed barrier beneath the stone are what separate a path that lasts from one that becomes a maintenance chore. Water that pools under stones in winter will freeze, shift the base, and leave you relaying pieces every spring.
Granite, sandstone, and slate handle that freeze-thaw cycle without crumbling, and they resist moss better than porous limestone or concrete aggregate, which stays damp and green over time. Decomposed granite packed between stepping stones stays put on flat ground but needs edging on any slope, or it washes out in the first hard rain. The upfront work, a solid base and the right stone, buys you a decade of walking without resetting or scrubbing.
7. Curved Pathways
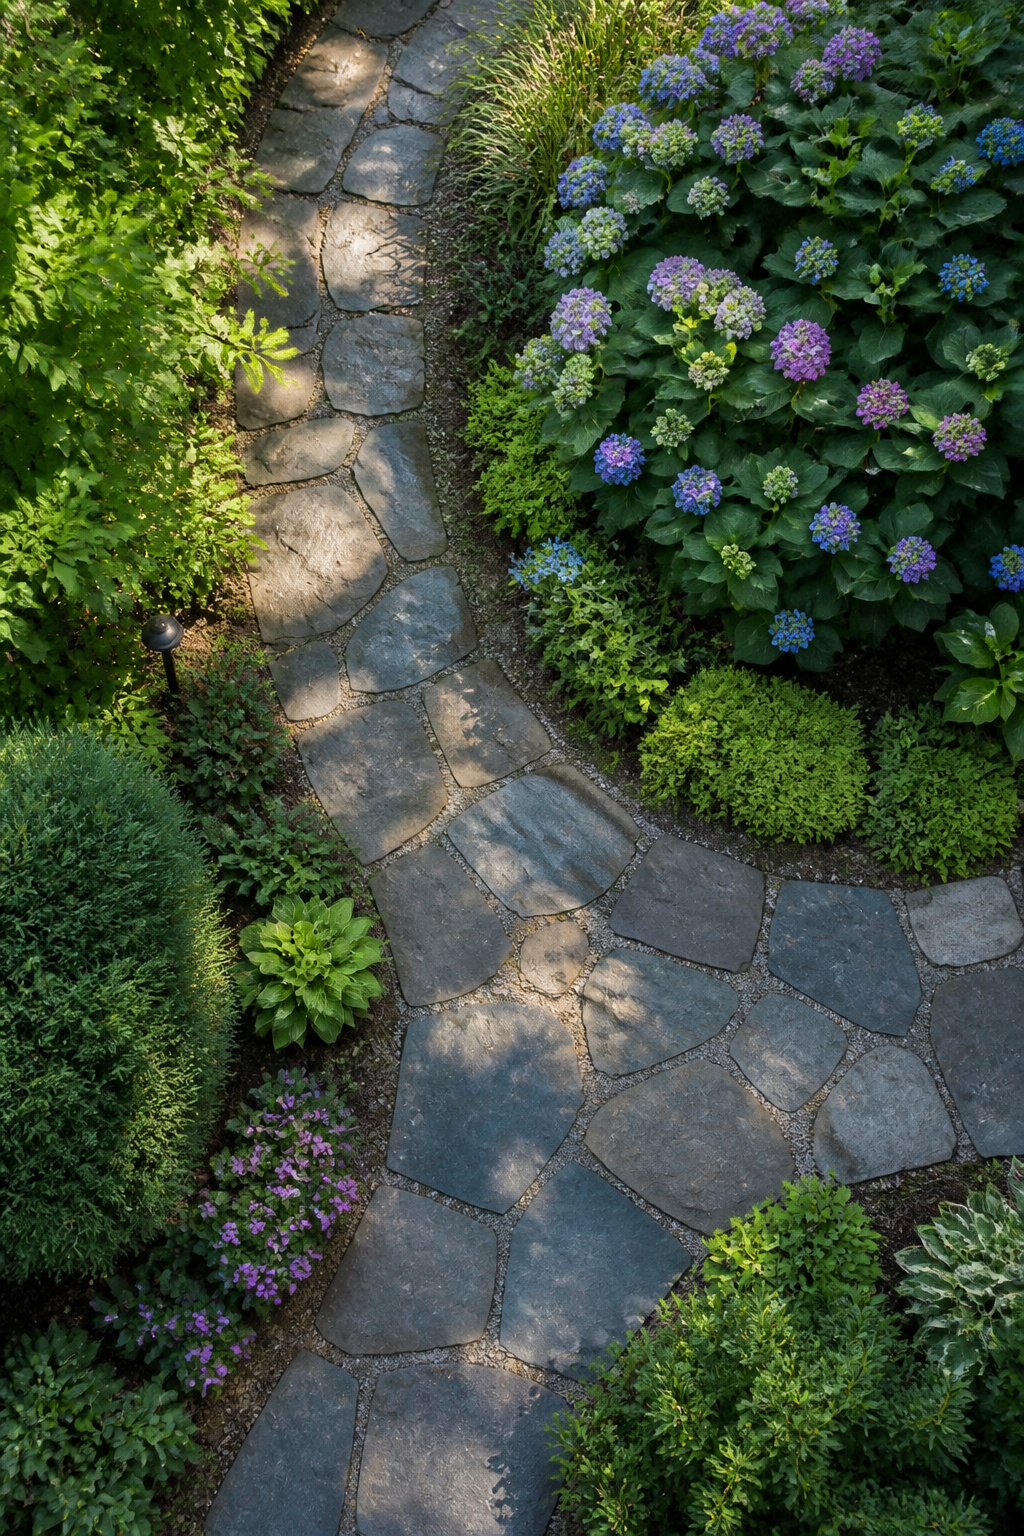
Straight lines pull the eye through a space without stopping. A gentle curve slows the visitor down and lets them notice the garden from more angles, which is exactly what a small yard needs when every square foot matters. I’ve walked paths that bent around a hydrangea bed or a small fountain, and the turn always felt like an invitation rather than a corridor.
Cutting stone to fit a curve takes more work than laying a straight run. Irregular slabs, especially something like bluestone steppers set in stone dust, let you ease the path along a natural arc without fighting the material. Rigid pavers or rectangles mean either spacing them awkwardly or making cuts, and neither looks informal once it’s done.
The walking surface still has to stay even. Curved paths tempt you to let the grade meander too, but a toe-catcher between stones ruins the mood fast. I keep the finished surface within about a quarter inch level across the path, same as any straight walkway, and let the plantings do the softening instead.
8. Zen-Inspired Paths
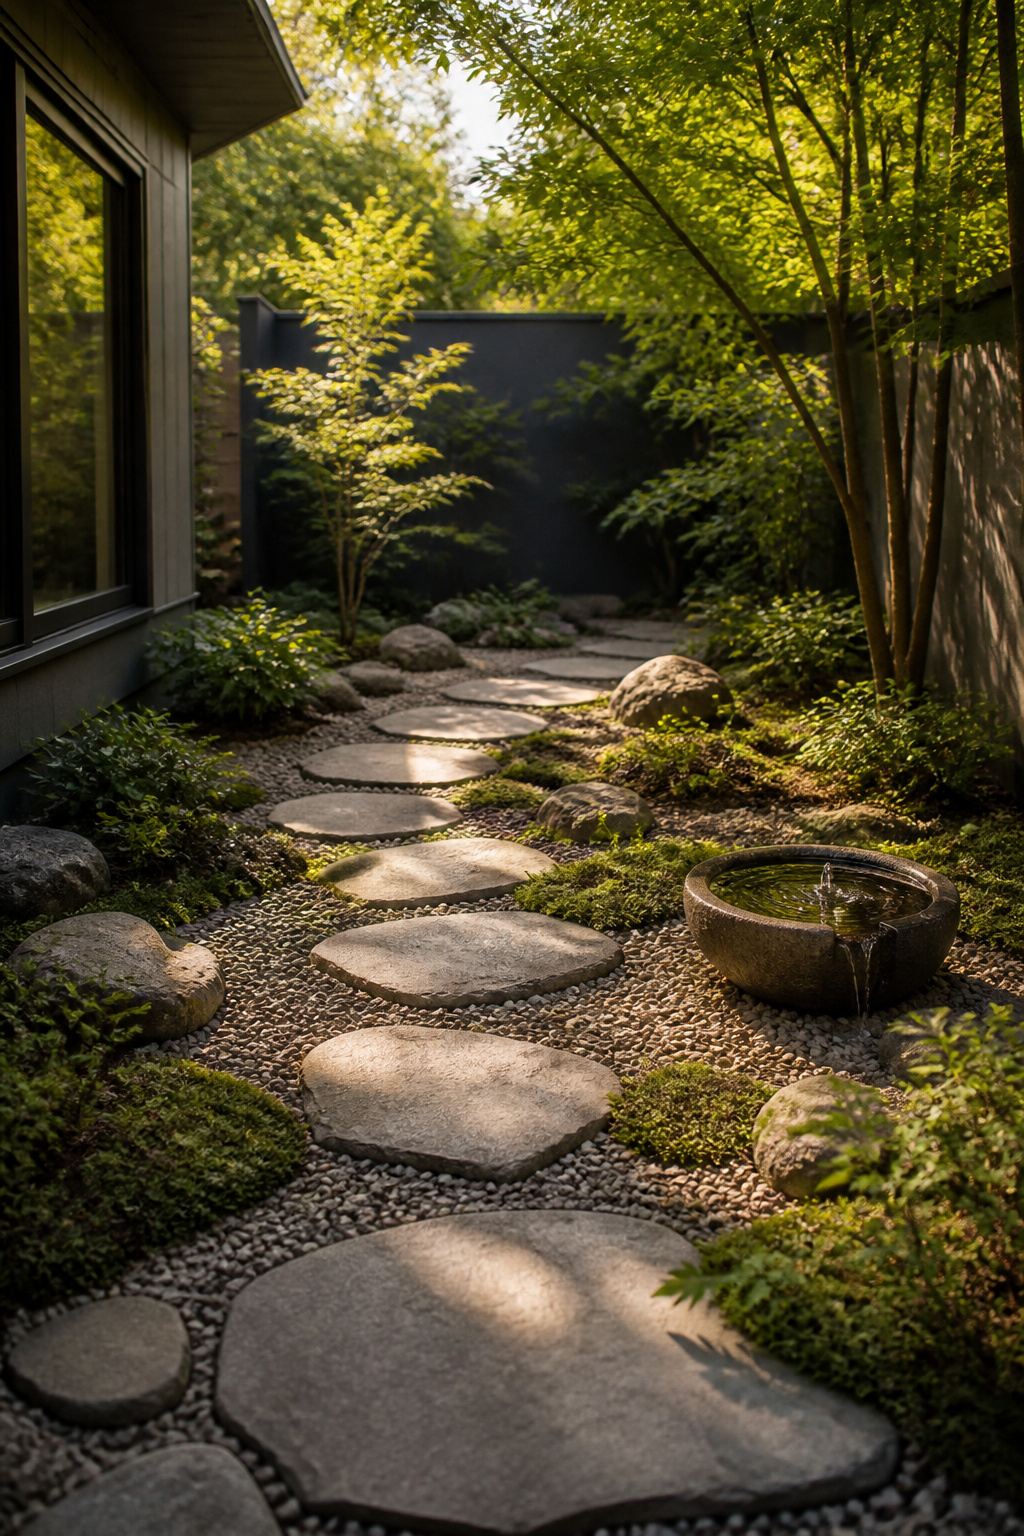
The quietest corner of my yard came together only after I stopped adding things. A Zen-inspired path works the same way: restraint in material choice is what creates calm, not emptiness. I used three elements only, gravel underfoot, a single water feature the size of a soup pot, and irregular concrete slabs laid as stepping stones with space between them for low ground cover to creep in.
Gravel gives the audible crunch that slows footsteps down. Concrete slabs, especially 18-by-18-inch architectural ones set with deliberate asymmetry, keep the eye moving without demanding attention. The asymmetry matters more than I expected: perfectly spaced stones read as a patio mistake, while offset placement reads as intention.
Water features here scale small. A basin of still water or a simple pour-over stone is enough; anything larger fights the restraint. This suits a corner you pass through on the way to somewhere else, or a spot for morning coffee rather than entertaining. The cost stays low because the material list is short and the labor is merely thoughtful placement, not precision cutting.
9. Mixed Material Pathways
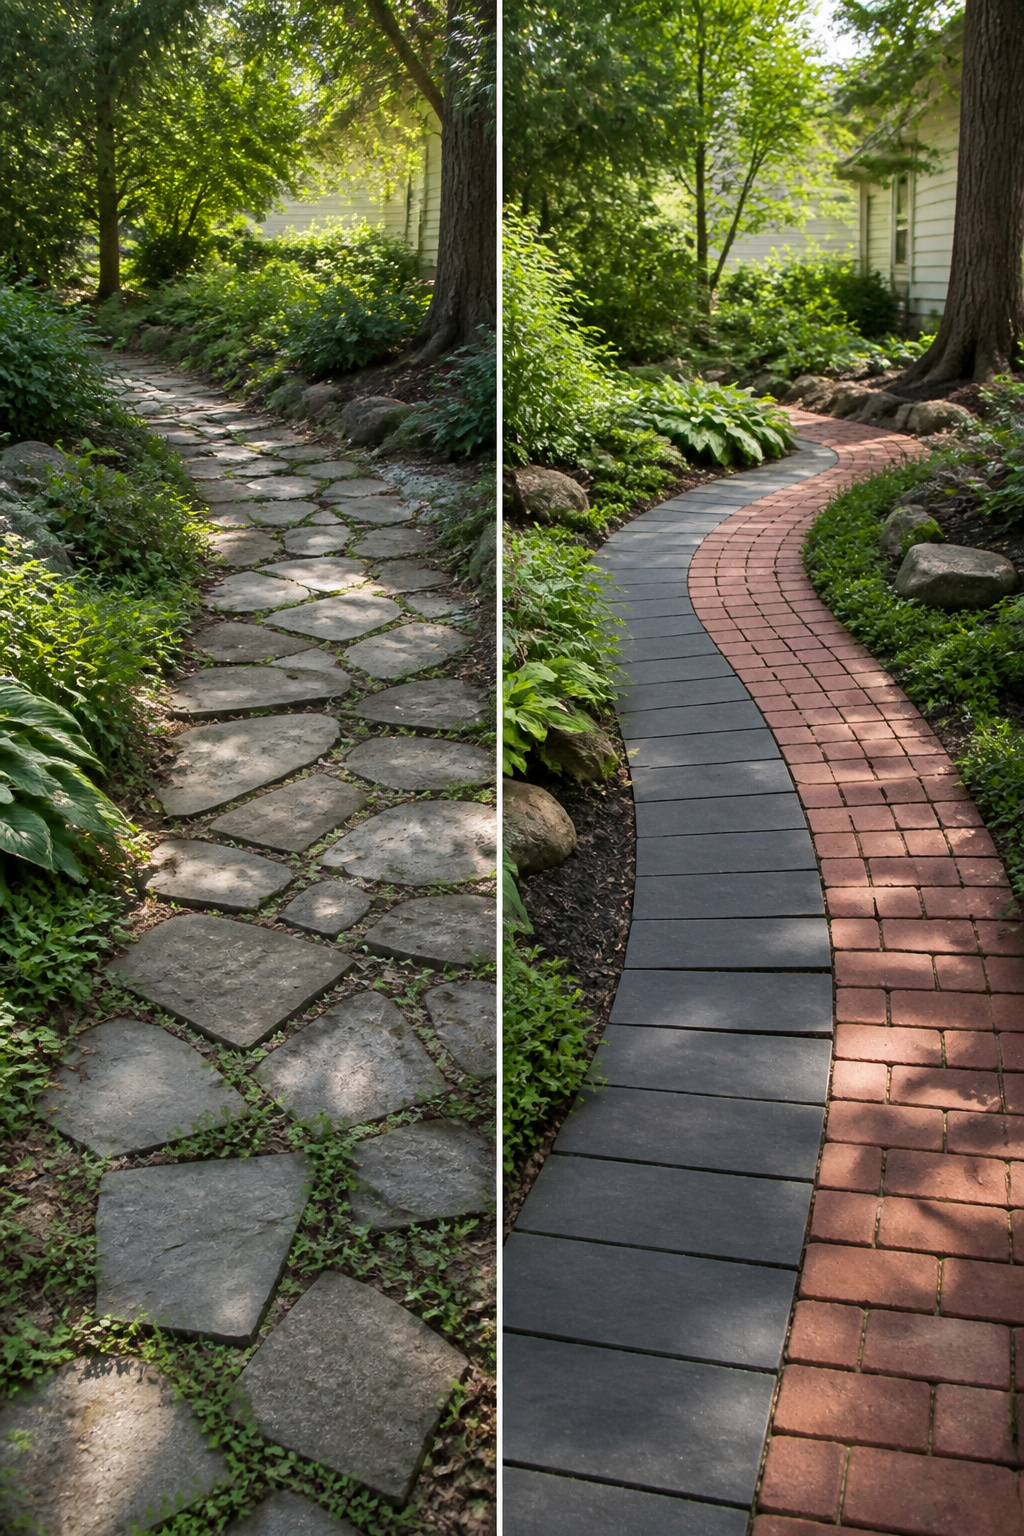
Dark slate paired with red brick, or sandstone laid alongside wood decking planks, breaks a garden into zones without needing a wall or fence. The contrast does the organizing: stone where the path takes daily traffic, wood where it widens into a seating spot, brick where herbs start and the rule changes to no shoes.
Differential settling is the detail that ruins the look. Stone, brick, and wood all move at different rates as the ground shifts and as water drains through or pools against them. I would set each material on its own compacted base rather than trying to lock them into a single bed, and I would leave a gap, maybe an inch, between the zones. That gap drains water that would otherwise sit at the seam and stain the wood or lift the brick.
Landscape edging, whether metal, plastic, or a row of buried brick, keeps the gravel or soil beneath each material from bleeding into the next. Without it, the clean line you paid for in the first season blurs into a mixed border by the third. A powered lawn edger run along the outer grass edge once a season keeps the whole thing from looking overgrown.
10. Flagstone Walkways
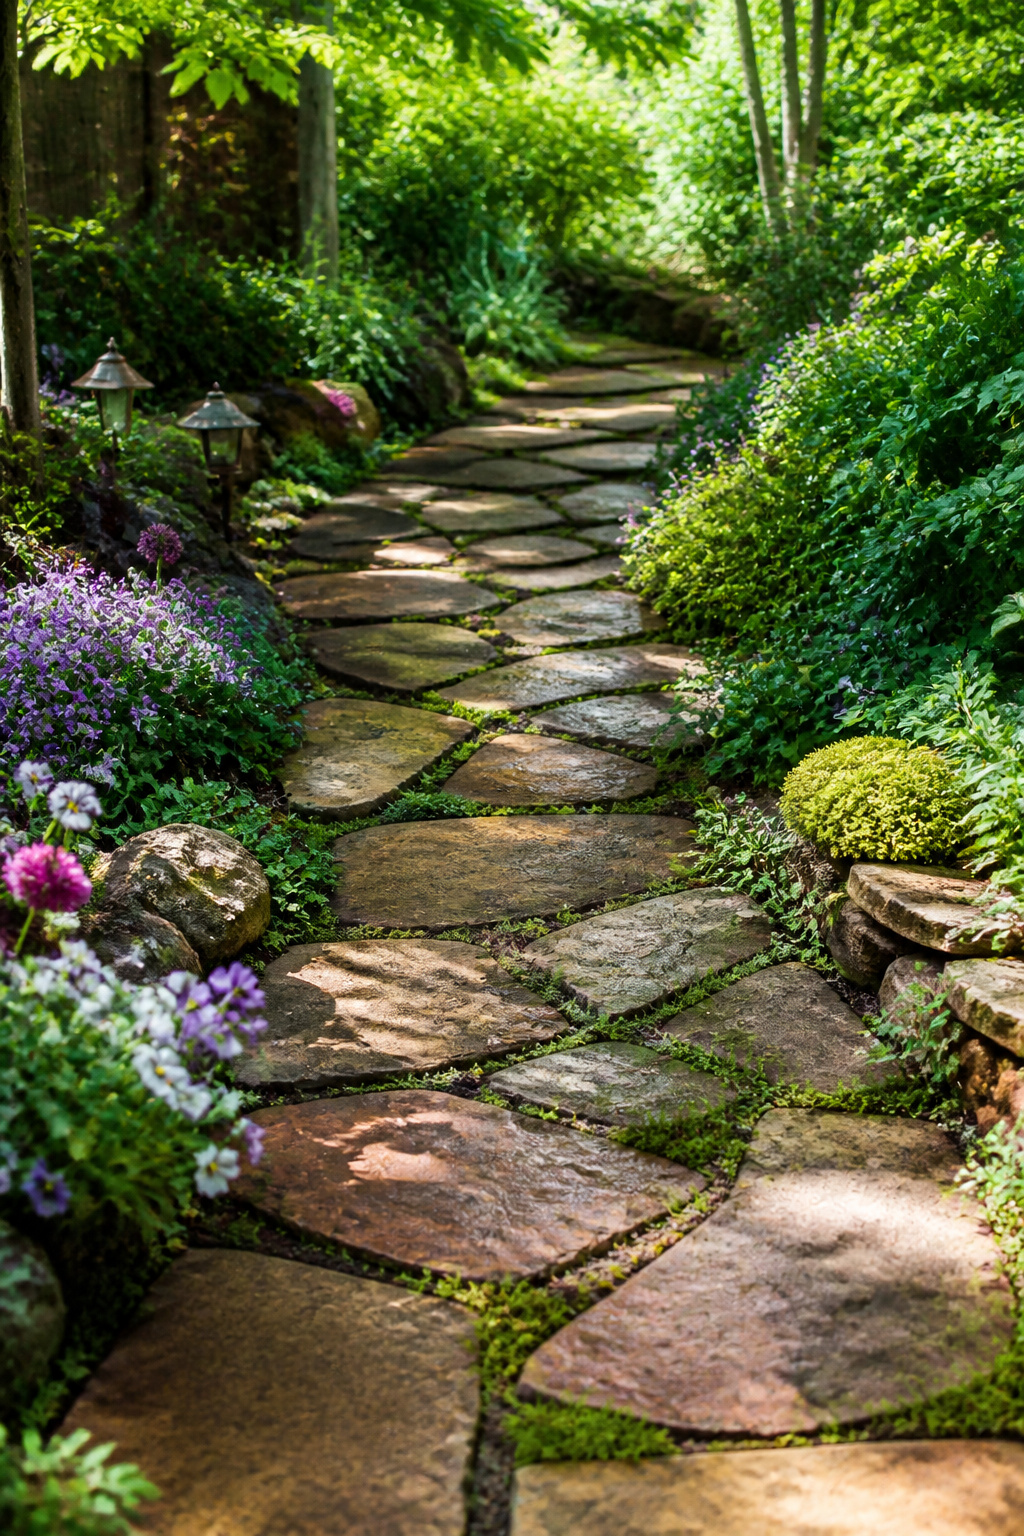
Flagstone sits flat underfoot and breaks in ways that look like it was always there, which is why it works as well for a straight front walk as for a path that wanders between vegetable beds. The irregular pieces leave gaps where thyme or moss can creep in, while cut flagstone with clean edges reads more like outdoor flooring. Both forms share the same durability: granite, slate, and sandstone withstand all weather conditions, and a properly laid flagstone walk can last 25 years or more with minimal upkeep.
What convinced me, reading through a dozen of these installations, is how rarely flagstone looks wrong. The earthy tones complement almost any landscape style, so the same material can bridge a formal herb garden and a loose cottage border without either space feeling off. Flat, irregular stones create a natural effect that suits winding paths, while cut stone brings enough order for a symmetrical design. That range matters when you are working one small yard that has to do several jobs at once.
Materials That Last
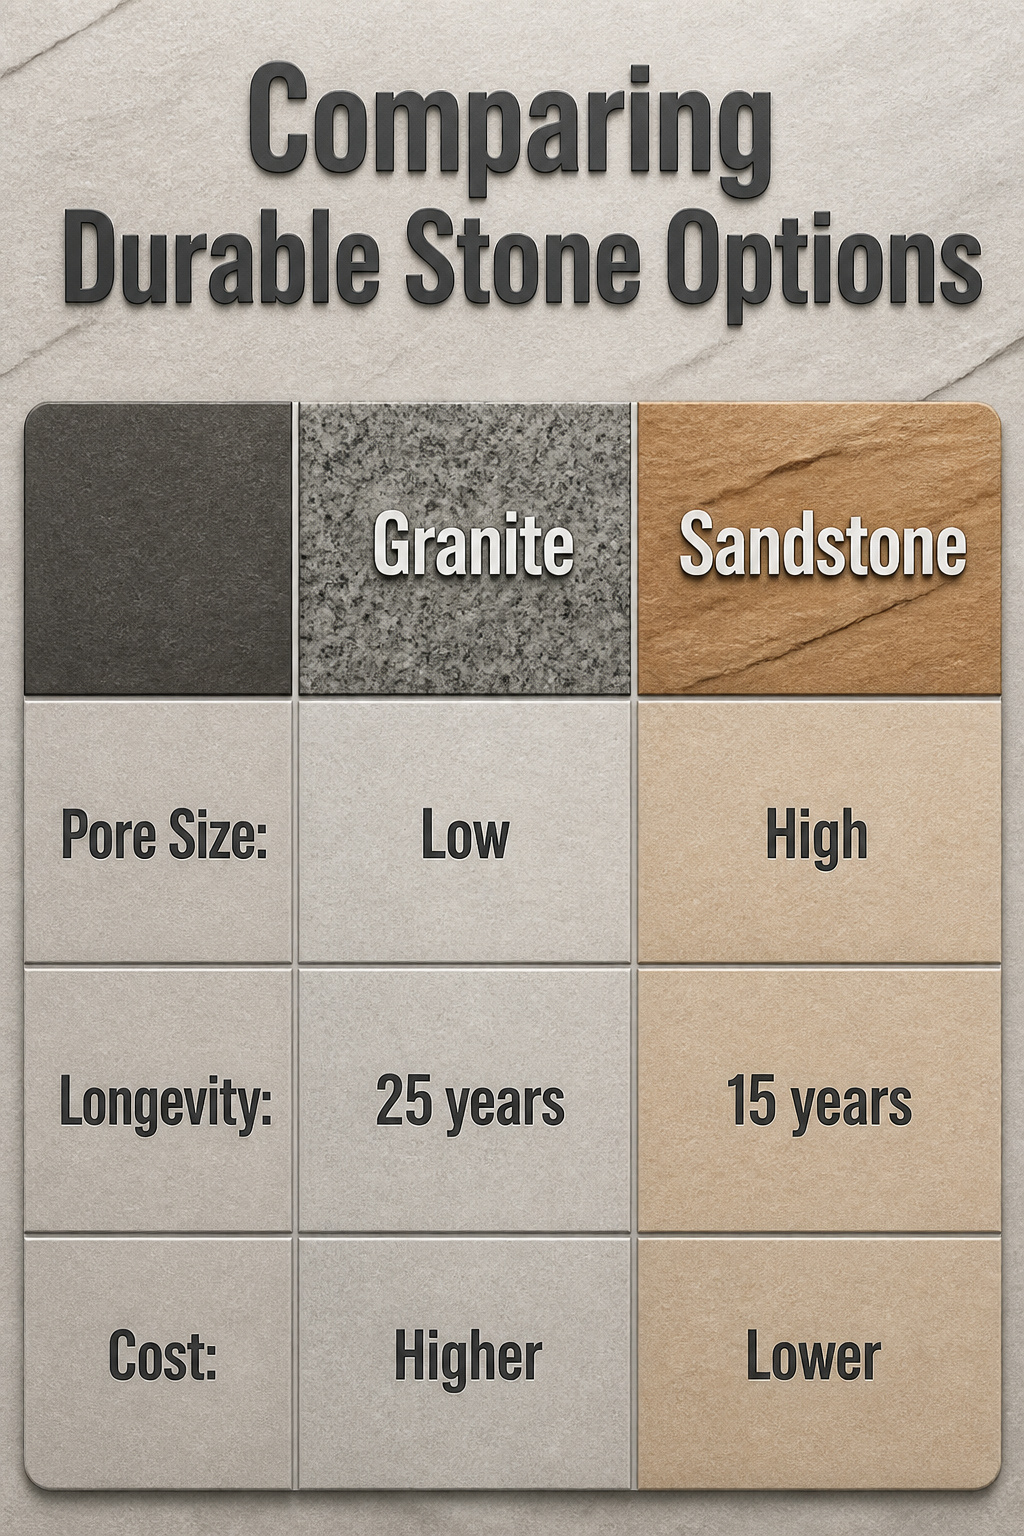
Granite, sandstone, and slate are the stones that survive decade after decade of freeze-thaw cycles, the kind that split lesser materials in a single hard winter. I watched a neighbor’s limestone path heave and crack after two seasons while my own granite side path, laid at the same time, stayed flat. The difference is pore size: granite and slate are dense enough that water cannot penetrate deeply, so expansion during freezing stays superficial. Sandstone handles the cold well too, though its porosity varies by subtype, and the softer varieties will need a tighter base to prevent shifting.
Matching stone to house style matters more than most beginners realize. A straight-edged slate in cool grays reads formal against a brick colonial; the same slate in irregular flagging suits a cottage garden. Warm sandstone works with cedar siding and rust-toned roofs. The mistake is choosing from a catalog photo rather than the local yard, where light and soil color alter everything. Local stone also keeps cost down and color consistent. Shipping granite from Vermont to Georgia doubles the price and introduces veining that clashes with regional clay. My slate came from a quarry forty miles away. The color matched my foundation exactly, and the delivery fee was negligible.
Design Before You Dig
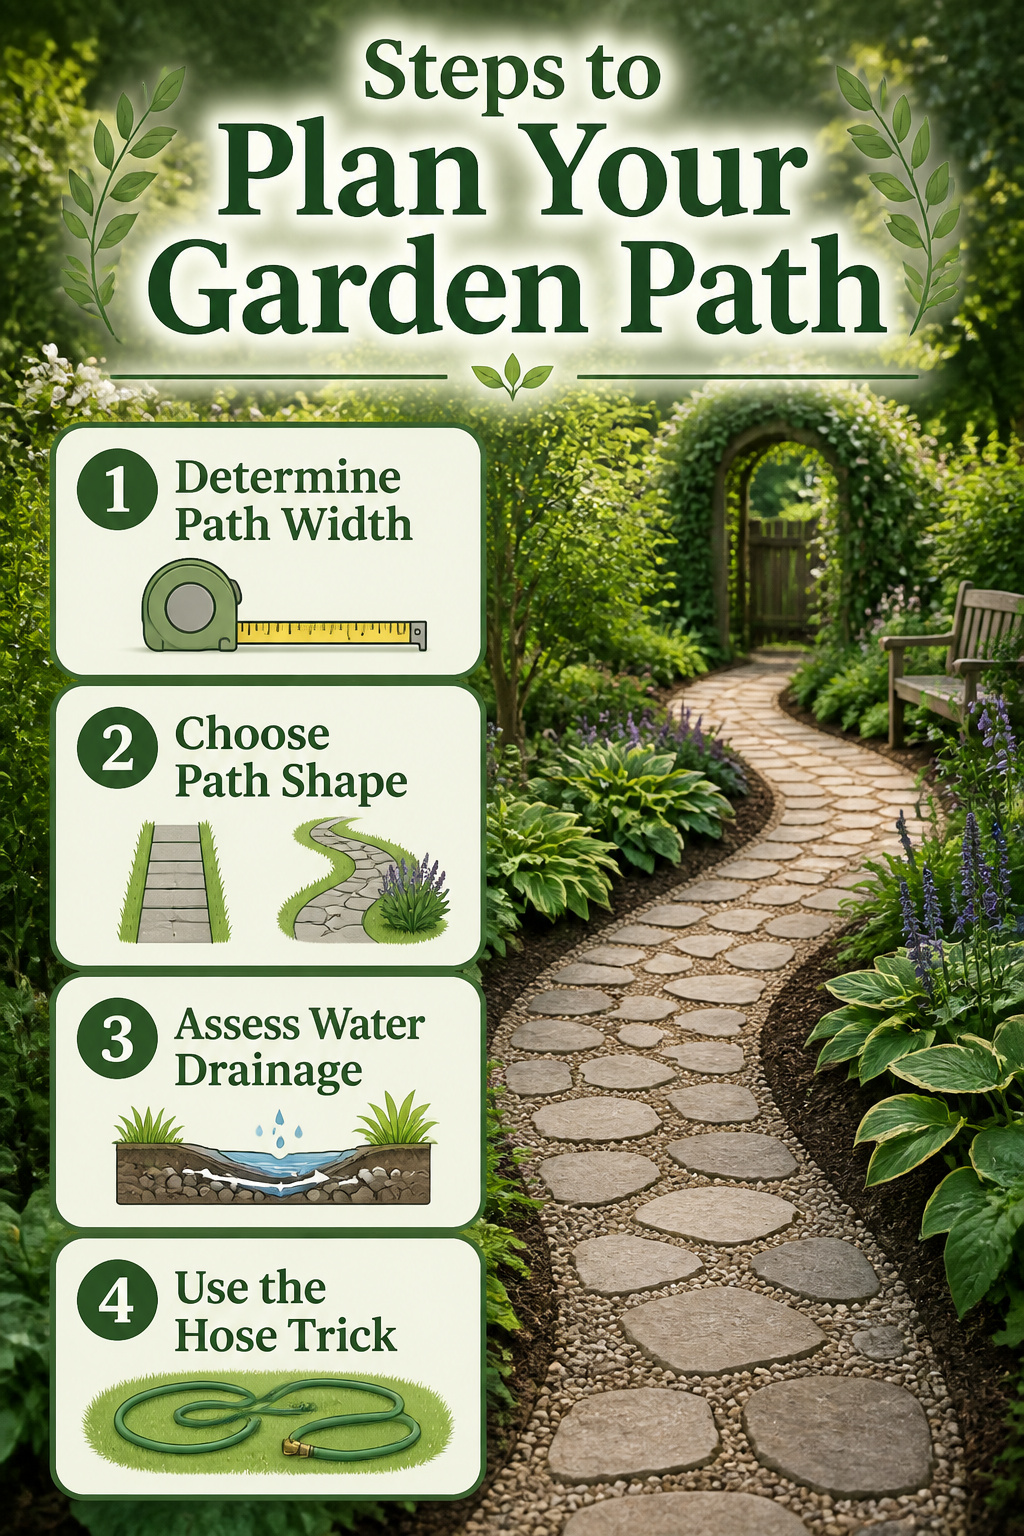
Scale is the first thing to get honest about. A path meant for two people walking side by side needs a different width than one hauling a wheelbarrow to the shed, and a line that looks generous on paper can bulldoze a small yard once the stones go down.
Straight paths carry a formality that announces where you are headed. Curves do the opposite; they slow the walk and hide the next bend behind a shrub or a turn of hosta. I spent longer than I care to admit pacing my own yard with a tape measure, trying to decide which mood I wanted, before I realized the decision was already made by the slope. Grade is not negotiable. Water pools where you flatten it wrong, and a step you did not plan becomes a trip you will take every rainy morning.
The hose trick is worth the ten minutes. Lay it out full-scale, walk it slowly, and notice where your feet want to cut the corner. The shape that survives a week of living with it is the one worth digging.
Building It Yourself
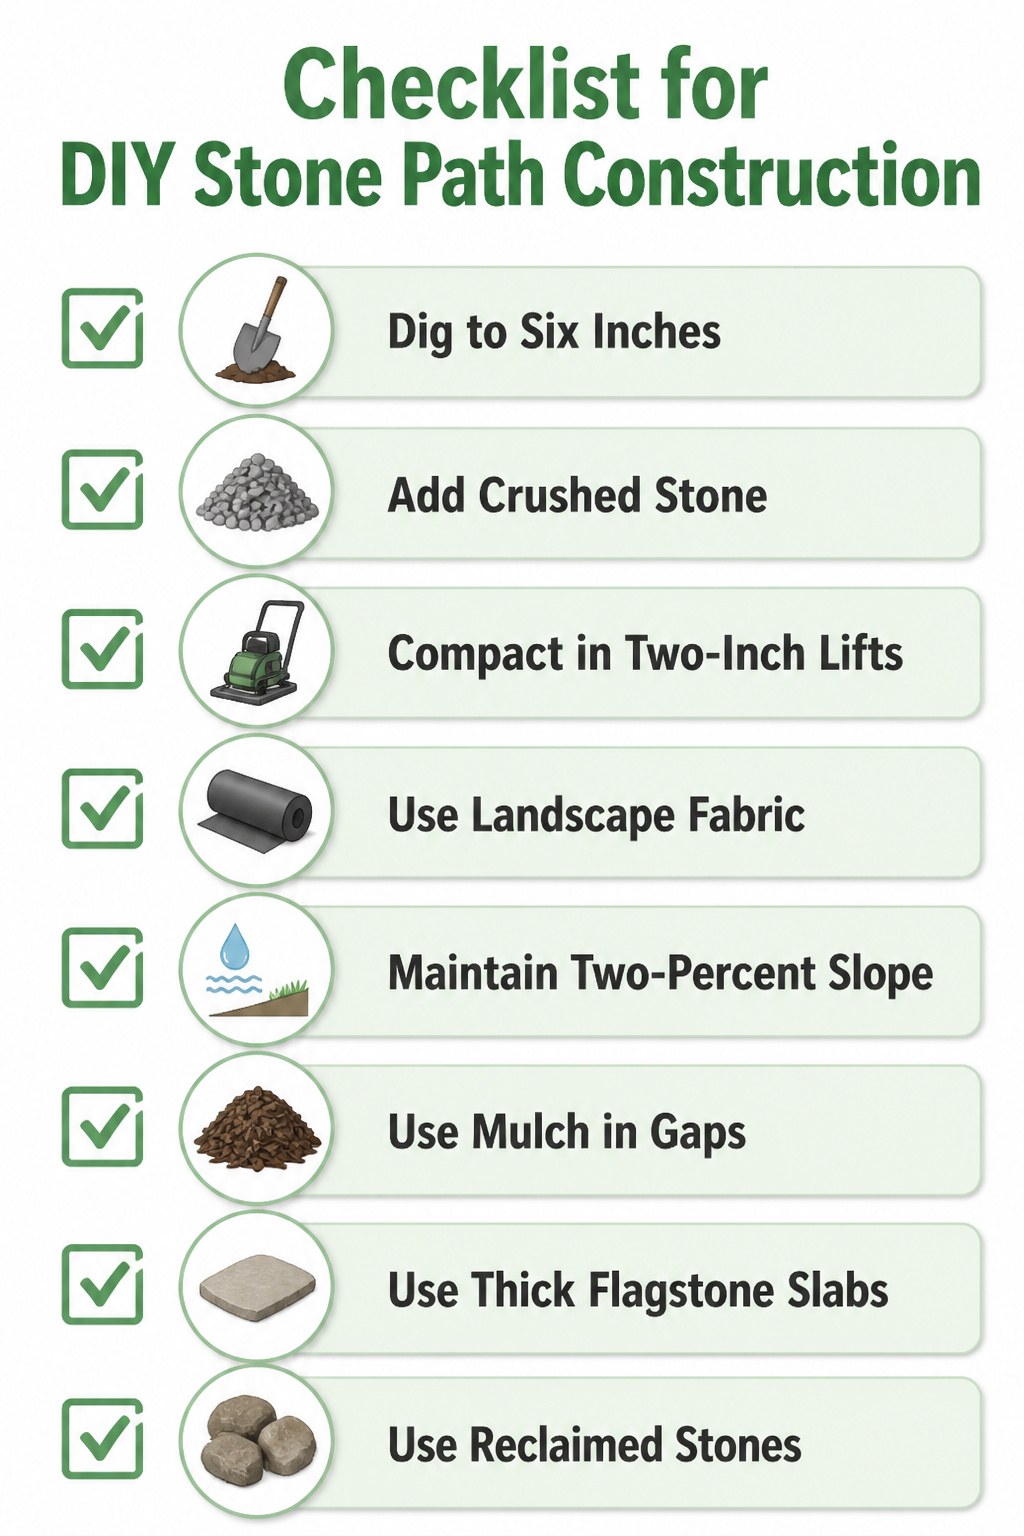
A gravel path with reclaimed stones set into it cost me the least and taught me the most about what matters. The base preparation decides whether your walkway lasts decades or shifts after the first hard rain. I dug down six inches, filled with crushed stone, and compacted it in two-inch lifts before setting anything on top. Skipping that step, or using loose soil as fill, is why first-timer paths heave and rut.
Weed control needs more than landscape fabric alone. Fabric works under gravel, but between stepping stones the gaps still collect enough soil for seeds. A two-percent slope away from the house, barely noticeable to the eye, keeps water from pooling and undermining the edge. I missed that on my first attempt and ended up regrading the whole thing the following spring.
Mulch paths are cheaper still and pair well with thicker flagstone slabs laid directly on soil. The stone takes the wear, the mulch fills the gaps, and together they keep maintenance low. Reclaimed stones from demolition or leftover landscaping runs keep the budget under what bagged pavers cost, and the random sizing looks more natural anyway.
What I Got Wrong the First Time
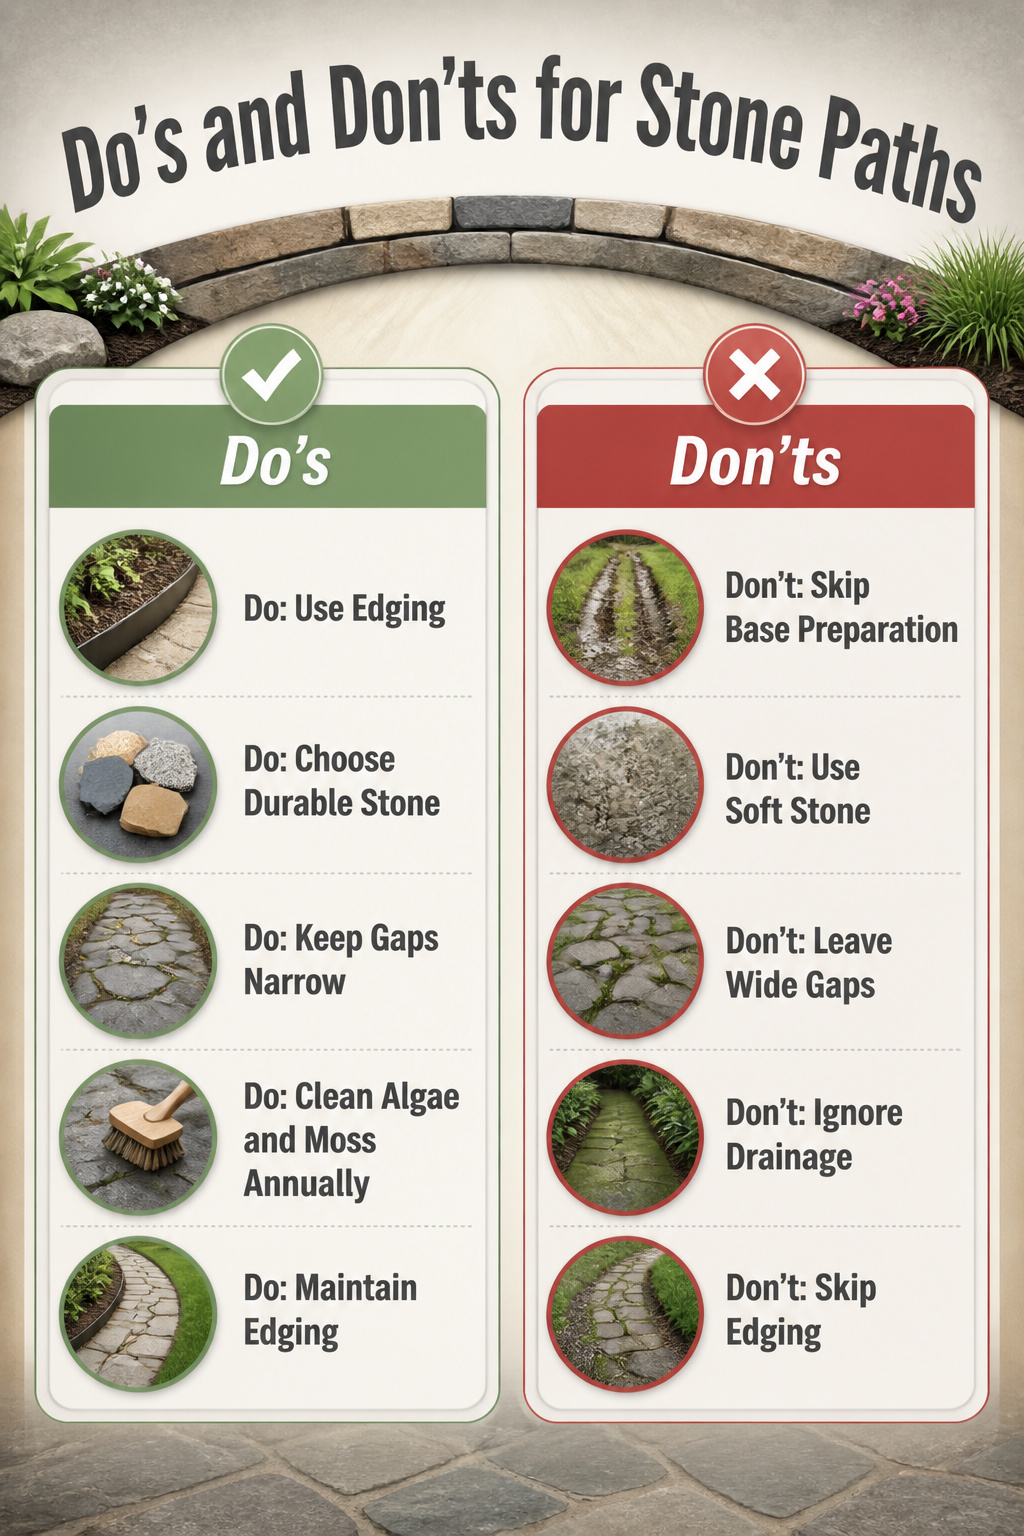
The first path I laid settled into a rut within two seasons because I had skipped edging entirely. Gravel bled into the beds every time it rained, and grass crept in from both sides until the "path" was just a vague suggestion. Metal or plastic landscape edging, or even a row of brick, would have saved me a full weekend of digging it all out.
Natural stone walkways can last 25 years or more, but that lifespan assumes you started with durable material. Granite, slate, and sandstone handle freeze-thaw cycles without flaking; softer stone I tried near the downspout turned to gravel in five years. The difference between low maintenance and constant repair is almost always the stone you chose on day one.
No stone path is truly zero work. Algae and moss need scraping off every spring if your walk stays damp, and weeds find any gap you left wider than a finger. The annual tasks that matter: pulling invaders before they seed, and checking that edging still sits flush. Choose hard stone and edge it properly, and that list stays short enough to finish before coffee gets cold.
Patterns and Plantings
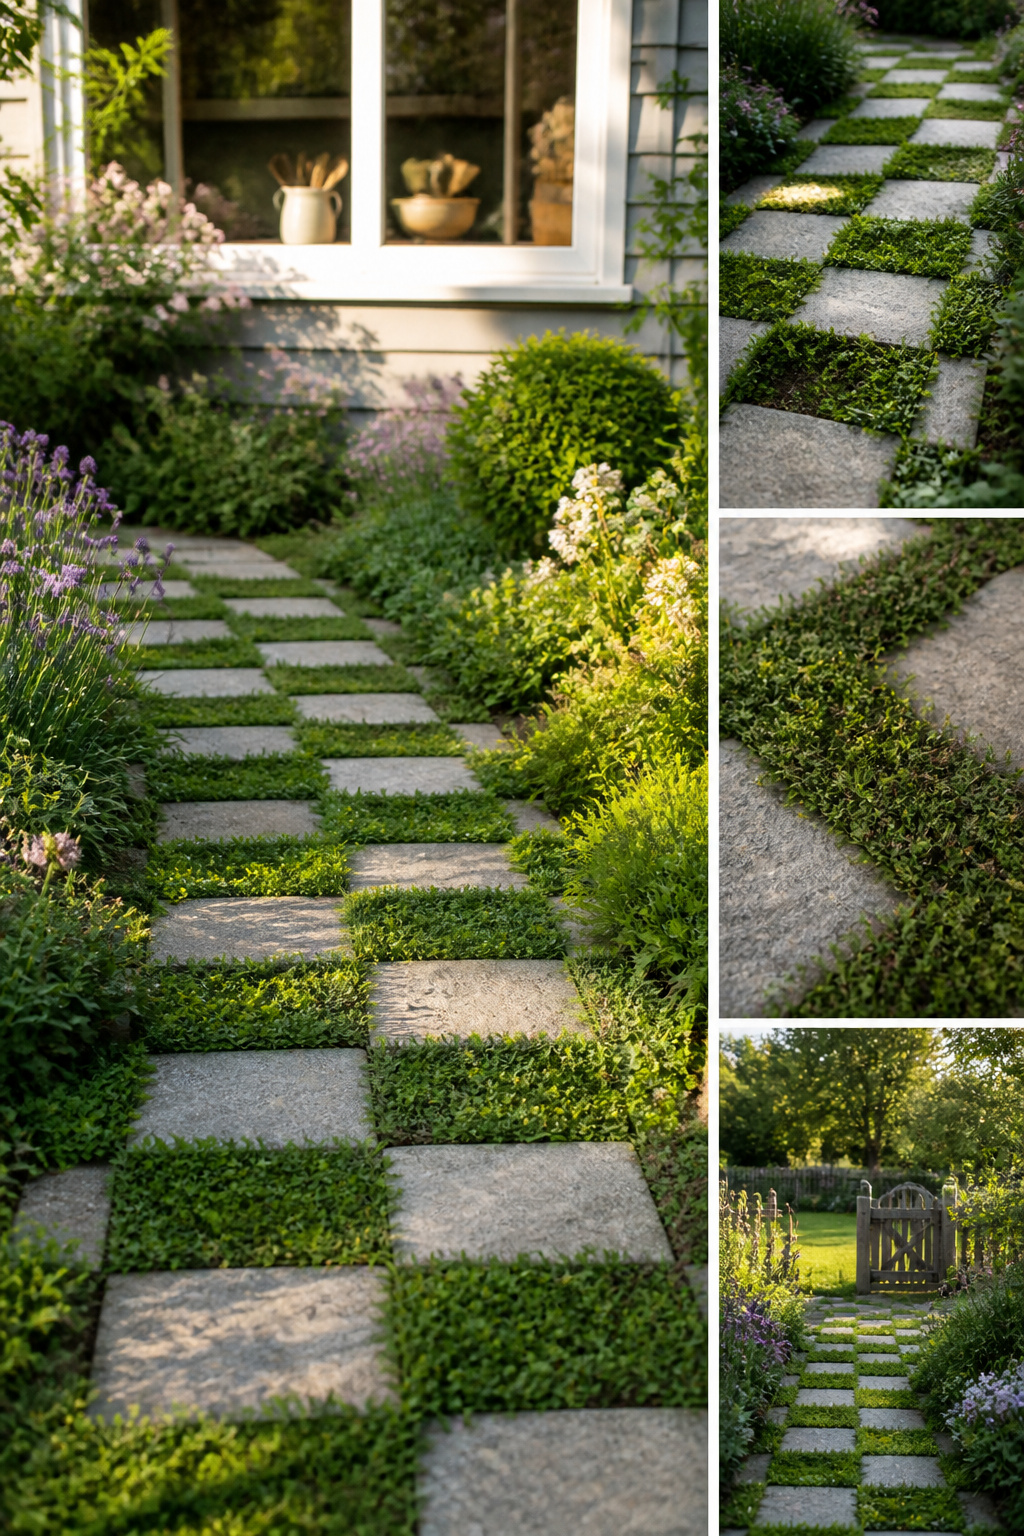
Herringbone and checkerboard patterns turn a simple stone path into something you notice from the kitchen window. I laid a small checkerboard section last spring using leftover pavers, and the open squares filled with creeping thyme faster than I expected. The plants soften the hard lines without hiding the geometry.
That interplay between stone and growth only gets better as the path ages. Stones settle slightly uneven; moss or groundcover creeps into seams you did not plan. A herringbone arrangement with cut slate or limestone shows this off well, the angled lines directing your eye while low planting blurs the edges.
Groundcovers between stones work as weed suppression as much as decoration. Corsican mint, Scottish moss, or chamomile tolerate light foot traffic and fill gaps where weeds would otherwise take hold. The tighter the planting, the less bare soil remains for unwanted seed to germinate. I have found this matters more in the second and third seasons than the first, when enthusiasm for weeding typically fades.
Frequently Asked Questions
What is the best stone for garden pathways?
Granite, sandstone, and slate are the most durable and weather-resistant choices. Granite stays flat through freeze-thaw cycles without cracking, sandstone softens at the edges for a cottage-garden feel, and slate handles damp conditions without crumbling. All three resist moss better than porous limestone and can last 25 years or more with minimal upkeep.
How can I make my garden pathway low maintenance?
Start with hard stone like granite or slate, install proper drainage with a slight slope away from structures, and use a weed barrier beneath the stone. Gravel borders around the path block weeds from creeping into joints, and keeping gaps narrower than a finger-width prevents invaders from taking hold. Annual scraping of algae and a quick edging check each spring are usually all that remains.
What is the cheapest way to build a stone garden path?
A gravel path with reclaimed stones costs the least. Leftover stone from a neighbor’s patio teardown, construction site piles, or broken concrete slabs set in sand read as flagstone from a few feet away. Pea gravel runs $1 to $3.15 per square foot, and mulch paired with thick flagstone slabs laid directly on soil keeps material costs even lower while the stone carries the foot traffic.
Are DIY garden paths durable?
Yes, if you build a stable base first. Excavate three to six inches, lay landscape fabric, then add and compact crushed stone in two-inch lifts before setting any surface material. Skipping this step is why first-timer paths heave and rut after the first hard rain. A properly based DIY stone path can last decades; one laid directly on soil shifts and sinks within seasons.
Can natural stone walkways withstand USA winters?
Yes. Granite and sandstone handle freeze-thaw cycles without flaking or cracking because their dense structure limits water penetration. Softer stones like some limestones can turn to gravel in five years, especially near downspouts where water pools. A two-percent slope away from the house, barely visible to the eye, prevents water from collecting beneath stones and undermining the base when it freezes.